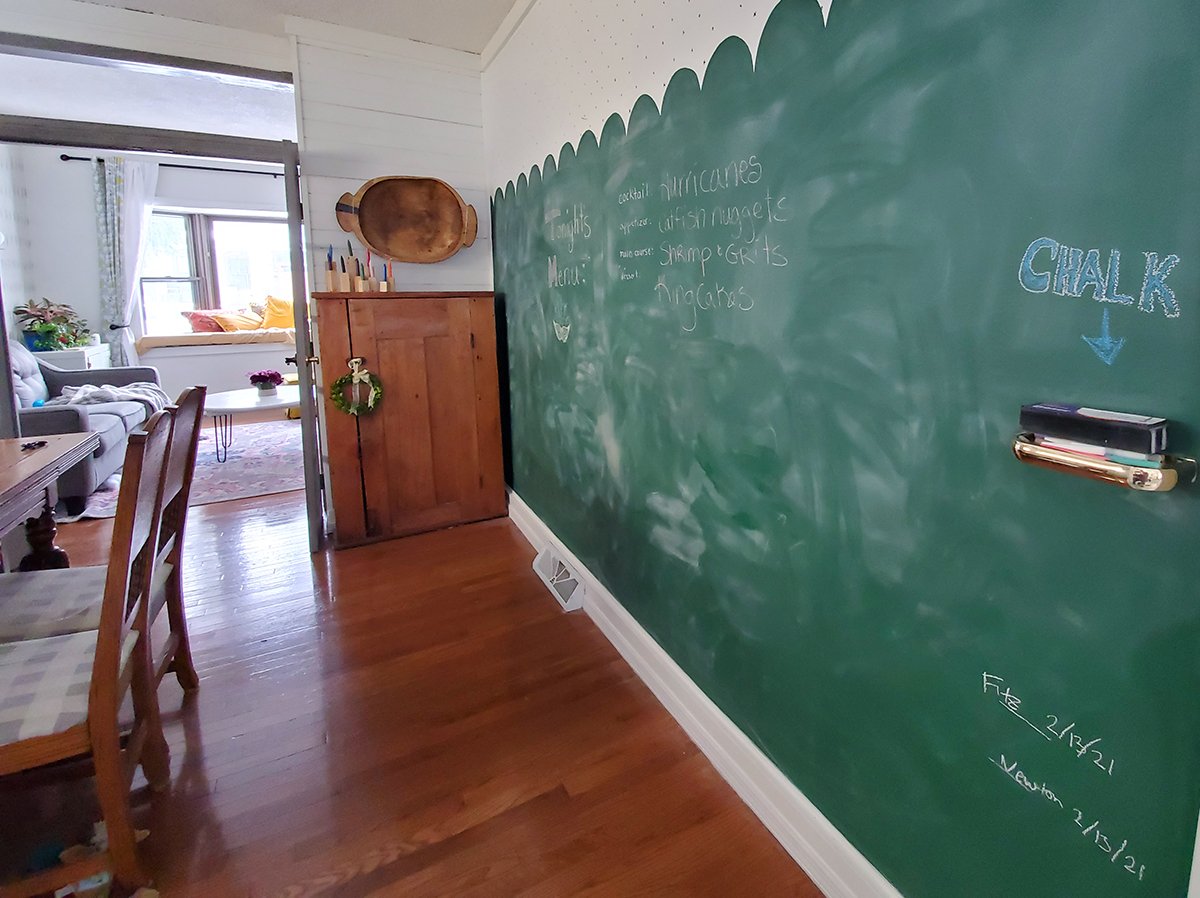
A chalkboard wall in the dining room isn’t for everyone. Especially a schoolhouse GREEN chalkboard wall. However, take a bit of inspiration from this project and create an accent wall for yourself. Perhaps you’ll even try a chalkboard wall, yourself? I’ve got the easy tutorial, tips & tricks, and thoughts on creating this chalkboard accent wall all for under $30!
Materials recommended for chalkboard wall:
If you do a quick Google of chalkboard wall you will get all kinds of tutorials showing you how to create a great chalkboard wall. DIY’s as well as inspiration to create your own. There isn’t a need for me to get too in-depth when there are others that are better than I. However, you ARE here so I’ll give you a quick rundown because it really is simple!
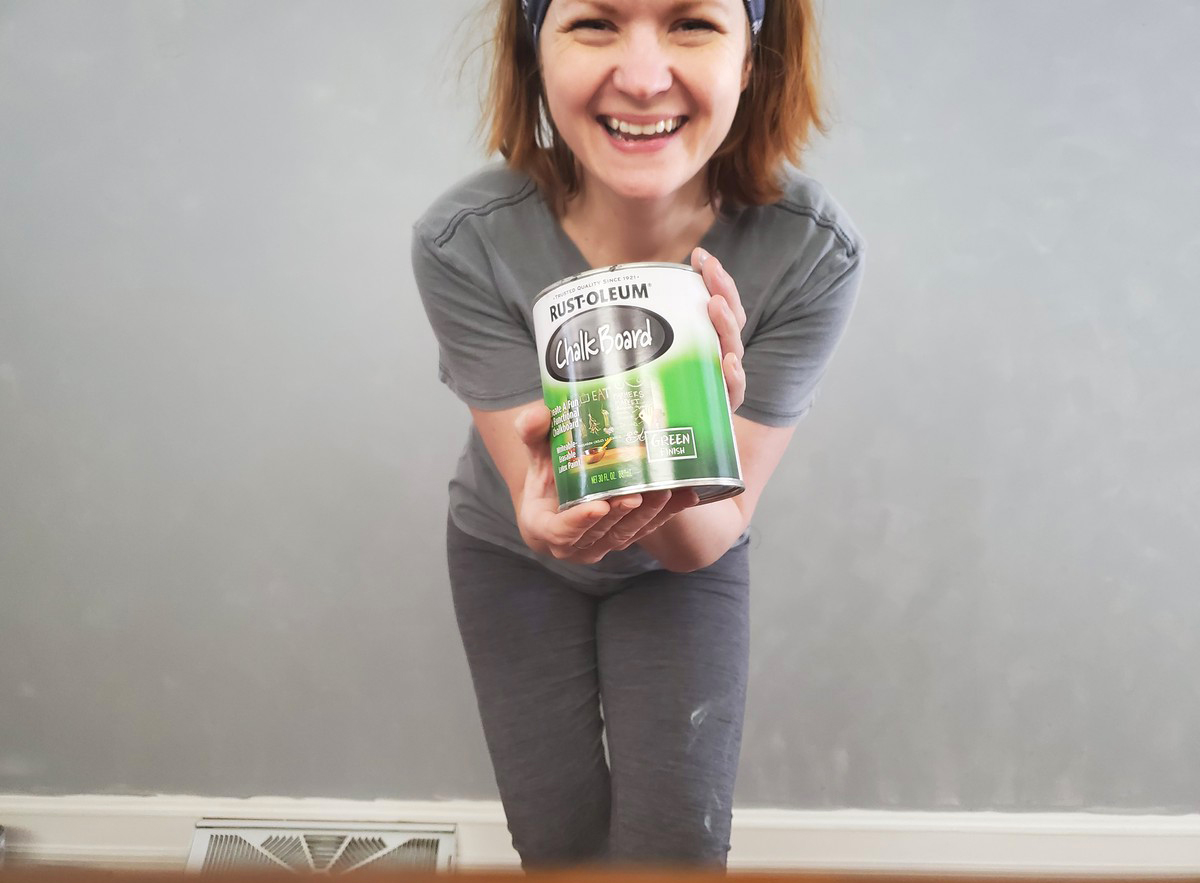
- Chalkboard Paint (different than chalk paint). I used the schoolhouse green color chalkboard paint from Rustoleum. Many chalkboard walls are the black color which is easier to find. In fact, Lowe’s even has chalkboard paint that you can dye to any color you choose. Very cool!
- Primer for dark colored paints. Chalkboard paint requires multiple coats to get a good coverage. Using a gray primer (I only used a single coat) cuts down on how much of the chalkboard paint you’ll need.
- Roller. I admit that I used a really cheap roller and a paper plate for this project. It did the job and cost only a couple of bucks allowing me to toss one after the primer and get a fresh roller for the chalkboard paint.
- Brush. I used a sponge brush for the primer and pulled out my trusty Purdy paintbrush for the chalkboard paint. You’ll need to use a brush that gives you good control if you want to create the scallops or go through the painstaking trouble of taping them off. Yikes!
- Painter’s Tape. I would recommend using painters tape if you aren’t skilled at keeping paint off the trim. If you are a skilled cutter, skip the tape.
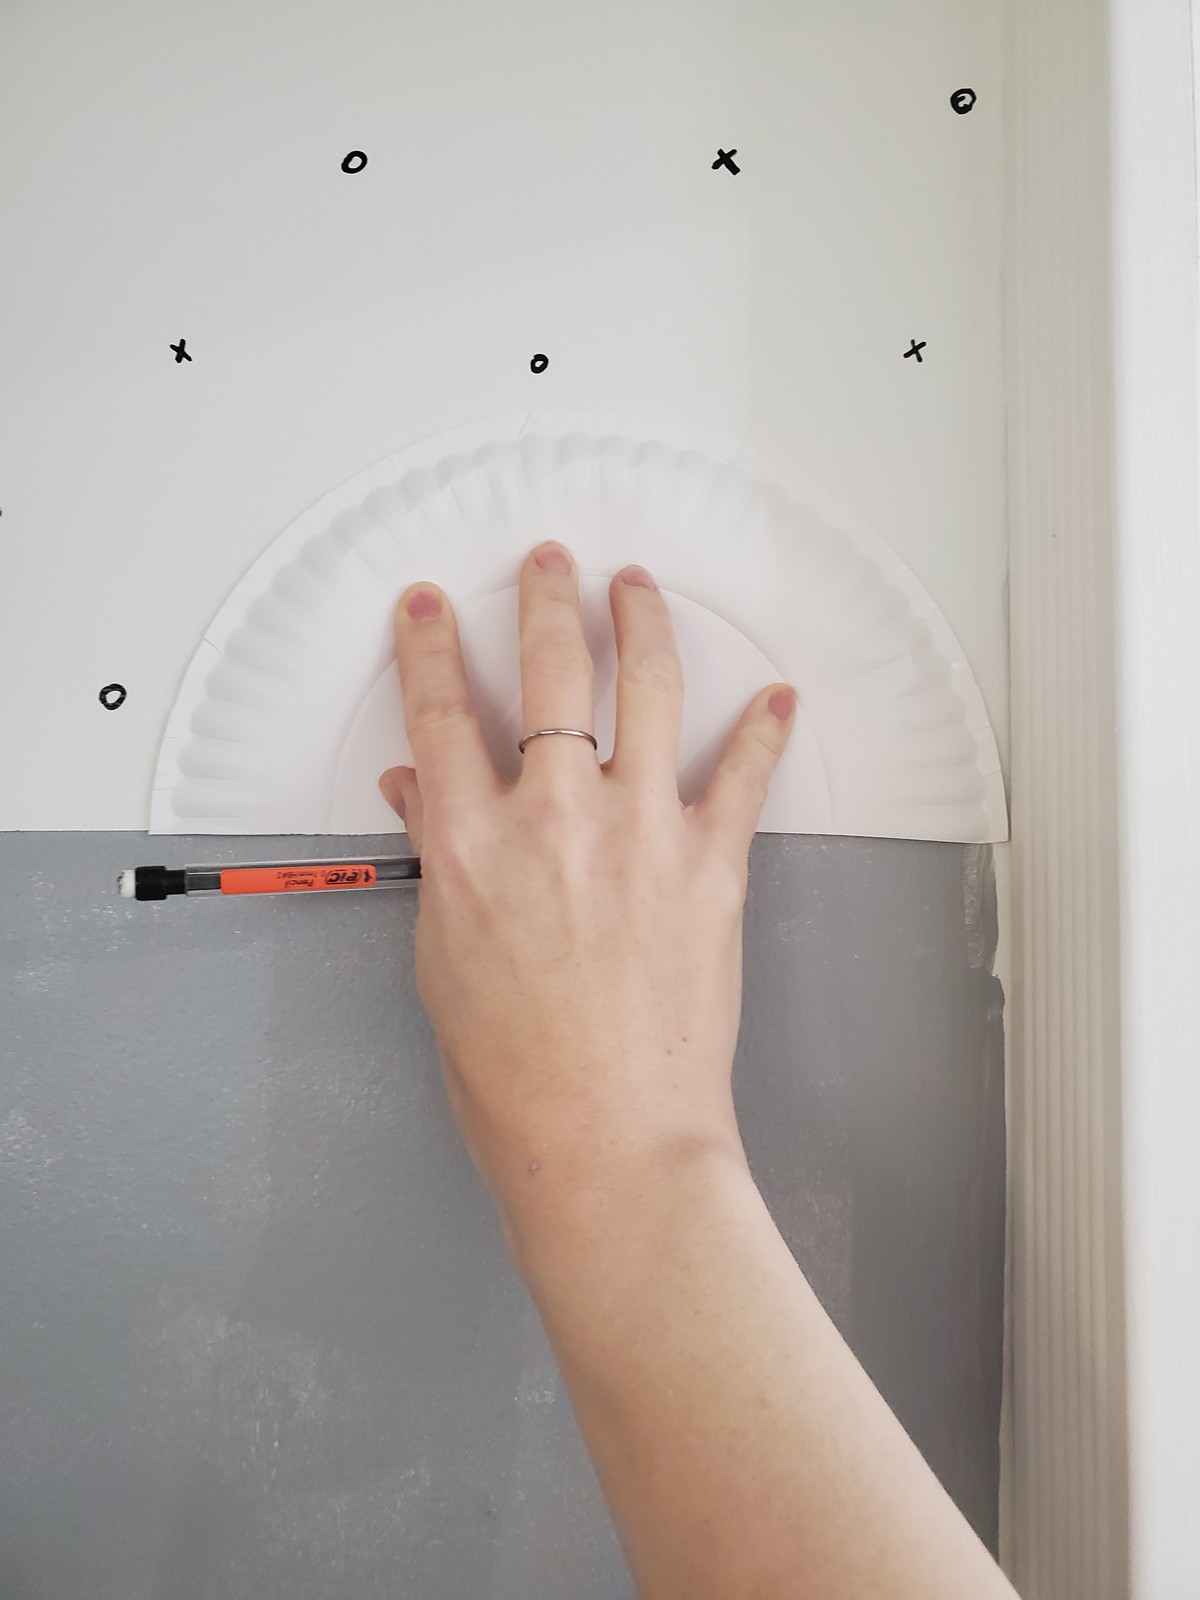
- Paper plate. To create the scallops I cut a paper plate in half and used the half as a template for the scallops. Easy peasy!
My wall before was white with a Sharpie design. It was a temporary fix until I decided what I wanted to do with it. I left that Sharpie design on the upper half of the chalkboard wall and am still deciding if I will paint over it or leave it as is.
Your very first coat of chalkboard paint will most likely not be enough coverage (you can see in the second pic) and you’ll need an additional coat. However, without the primer for dark paints you would most likely need MULTIPLE coats.
Tips for painting a chalkboard wall:
- Use a primer on the walls designed for dark paints so you don’t have to use a ton of the paint.
- Be aware that the chalkboard paint is a bit more “goopy” than traditional paint. Work a bit quickly and don’t let it sit and dry out. Wrap your brushes in plastic when not in use.
- The paint dries fairly quickly and you can put a second coat up within a couple of hours of the first coat.
- To create a straight line, if doing only a half or 3/4 wall, use painter’s tape to create a clean edge. A level will help you be sure your line is right or live dangerously, like I did, and eyeball it.
Tips for creating a scalloped effect:
- Half of a paper plate is perfect for a scalloped template. If you would like a smaller scallop use a smaller plate. For a larger scallop you may need to use a 12 by 12 piece of cardstock and cut the scallop out.
- After you have used painter’s tape to create your 3/4 wall line line up your template as straight as possible on top of the line you created. Pencil in your template design. Repeat across the wall.
- Be sure to use primer and paint to cover your pencil lines.
- If you aren’t steady enough with a 2 inch brush to create your horizontal lines, grab a small artist brush to create the scalloped lines and then fill in with the larger brush.
To use your chalkboard wall:
- You need to prime your chalkboard wall the very first time you want to use it or you risk your first drawing being there permanently. Do this by rubbing laying a piece of chalk (the long way) along the wall until it is completely covered.
- When you have completely primed your wall with a coat of chalk use an eraser to rub it in really well.
- Remove the chalk with damp towel and you are ready.
- You will find that chalk leaves a dust behind. There is non-toxic dust-free chalk that helps. It isn’t truly dust-free, unfortunately. But it IS dust-LESS and makes a big difference.
- Keep an eraser and chalk nearby and will find your family & friends often writing or doodling on the wall. A wall mounted soap dish works fantastic for holding the eraser and chalk.
I asked on IG and Facebook how many of you would put a chalkboard in your dining room and about 60% said NO. I wonder why? Is it because of the dust, the casualness of a chalkboard wall, or that you didn’t realize the chalkboard paint came in a color other than green or black. I’d love you to weigh in…would you put a chalkboard wall in your dining room?
Other $30 BIG IMPACT projects:
- easy DIY Pet Art (Full tutorial, video, & PDF)
- easy DIY Barn Quilt ANYONE can make!
- DIY Song Lyric Art (canvas & Sharpie!)
- DIY Photo Display Board
- Painted Dropcloth Rug
- easy Shoe Organizer Vertical Indoor Garden
- Hi DIY Doormat –no crafting skills needed!
- Must-have Guide for Stenciling a Wall
- Homemade Soy Candles
- Chalkboard Accent Wall


