Personalize a cheap outdoor entry rug with spray paint and tape into a fun, colorful, long lasting DIY doormat! No need for crafting skills or special materials.
This DIY Doormat comes in well under $10 (especially if you have paint and tape laying around at home, already). And if your mat is still in good shape after the season, give it a good vacuum and new fresh coat of paint!
[cp_popup display=”inline” style_id=”55171″ step_id = “1”][/cp_popup][cp_popup display=”inline” style_id=”55172″ step_id = “1”][/cp_popup]
Other $30 BIG IMPACT projects:
- easy DIY Pet Art (Full tutorial, video, & PDF)
- easy DIY Barn Quilt ANYONE can make!
- DIY Song Lyric Art (canvas & Sharpie!)
- DIY Photo Display Board
- Painted Dropcloth Rug
- easy Shoe Organizer Vertical Indoor Garden
- Hi DIY Doormat –no crafting skills needed!
- Must-have Guide for Stenciling a Wall
- Homemade Soy Candles
- Chalkboard Accent Wall
Note: I keep an eye open for great, inexpensive door mats that go on clearance and work well for painting and stenciling.
Tip: Try changing the design, stenciling a simple word, or even using sponges to create a unique painted design. Make your own special Ho Ho HO rug for Christmas!
Grab a dropcloth, sponges, and craft paint to create a cheap Painted Dropcloth Rug for under $30!

Materials for the DIY Doormat:
- Rustoleum Ultra Cover Spray paint in 3 colors (finish is fine). You will only use about 1/4 of the can so if you have paint laying around…this is a perfect project for that use!
- Inexpensive, solid colored fabric outdoor entry mat.
- Painters tape.
- Paper, newspaper, tarp or other material to protect your welcome mat and surrounding surfaces from the paint overspray.

To create the striped effect:
- Use tape and paper to block off the center of the rug from paint overspray and create what will be your stripes and message area. Be sure to tape it well!
- Spray each unblocked portion of the rug with a different colored paint being sure to point the paint can AWAY from the rest of the rug.
NOTE: it is best to to this outside on a rug, trash bag, or inside of a large box. Alternately, you could forgo the spray paint and us outdoor craft paint and a brush. - Be sure to let each coat dry for about 10-15 minutes before applying an additional coat.
For the best long-term results be sure that the spray paint is applied in multiple layers to give it the best chance of sticking to the fibers.
To Create the Message:
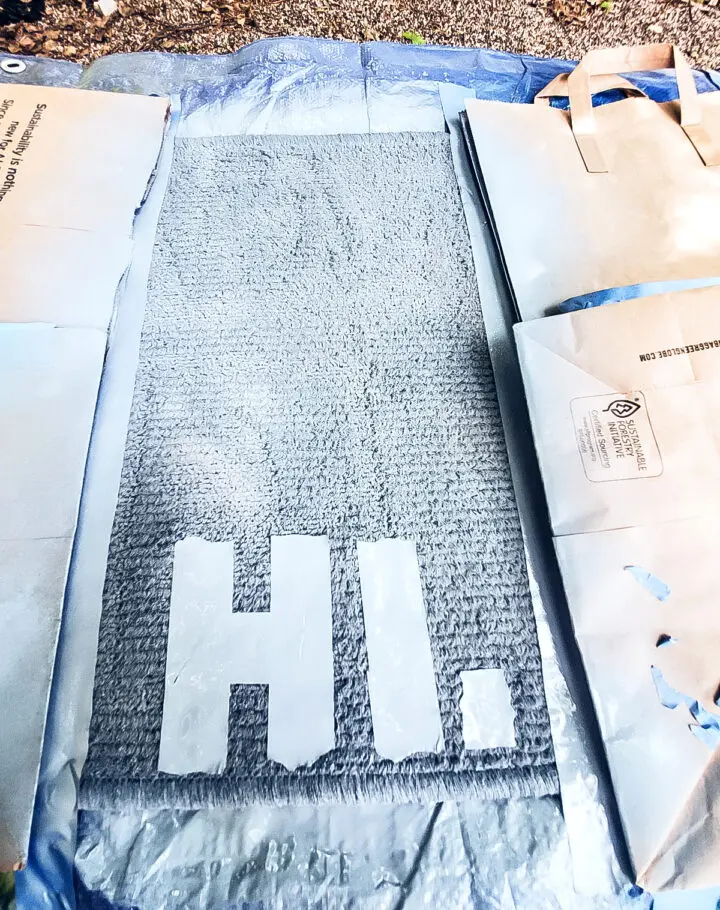
- Use your painter’s tape to create block letters on the rug. Use a scissors to cut the tape if you are looking for perfect lines. Be sure to press the tape down firmly.
You could use stencils to create more elaborate messages or designs. - Apply tape to the uncolored section of the rug that you want to act as your white (or whatever color your rug is) stripe, the part of the rug without ANY paint (see the photo below).
- Protect the stripes of rug that you previously painted (on either side of the message area you are currently working with) with paper and tape.
- Spray the unprotected part of the rug with the taped message on it with your chosen color of paint. Be sure, again, to wait in between each coat for about 10 minutes before applying the next.

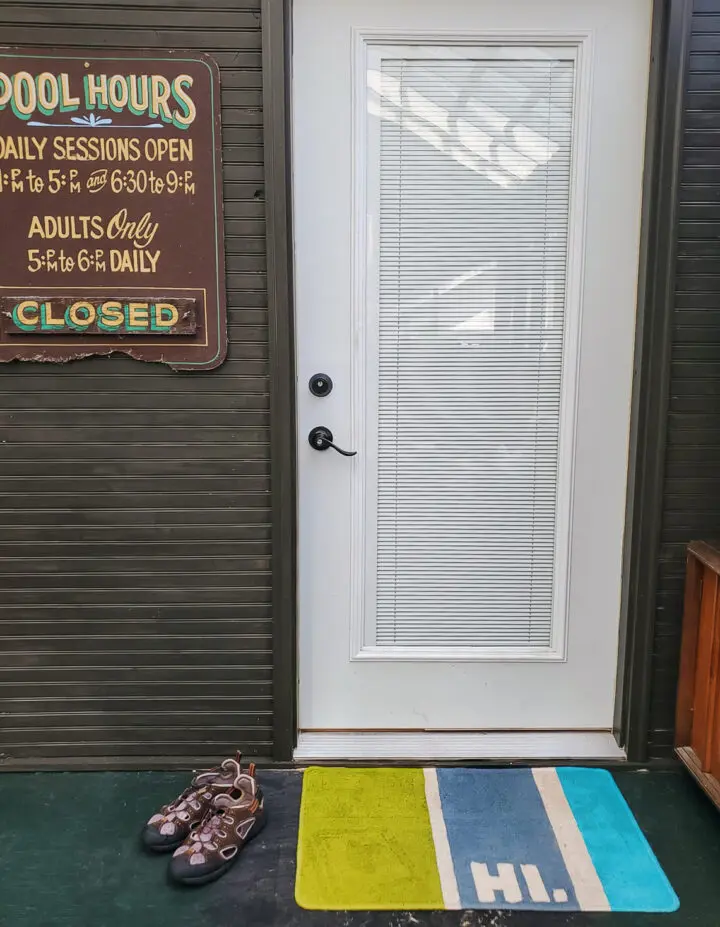
And ta-da…you have a fun, personal, and colorful rug! Any leftover paint? I’ve got the perfect projects to put those cans to use!
You will be happy to know that since taking this photo I have finished painting the porch floor (look closely and you’ll see two different colored floors. I hadn’t figured out how to paint the strip we walk on everyday until recently.
I know I’ll get questions about that pool sign. We lived in Grantsburg WI area for 15 years. That is the original sign that hung on the Grantsburg Public Swimming Pool and was used for decades. Isn’t that a neat piece!