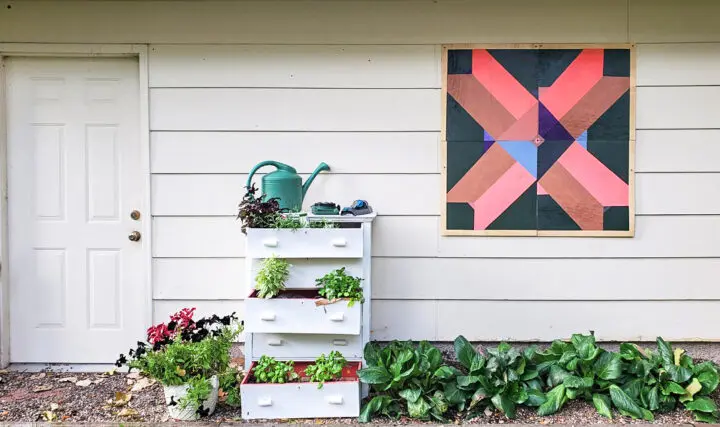
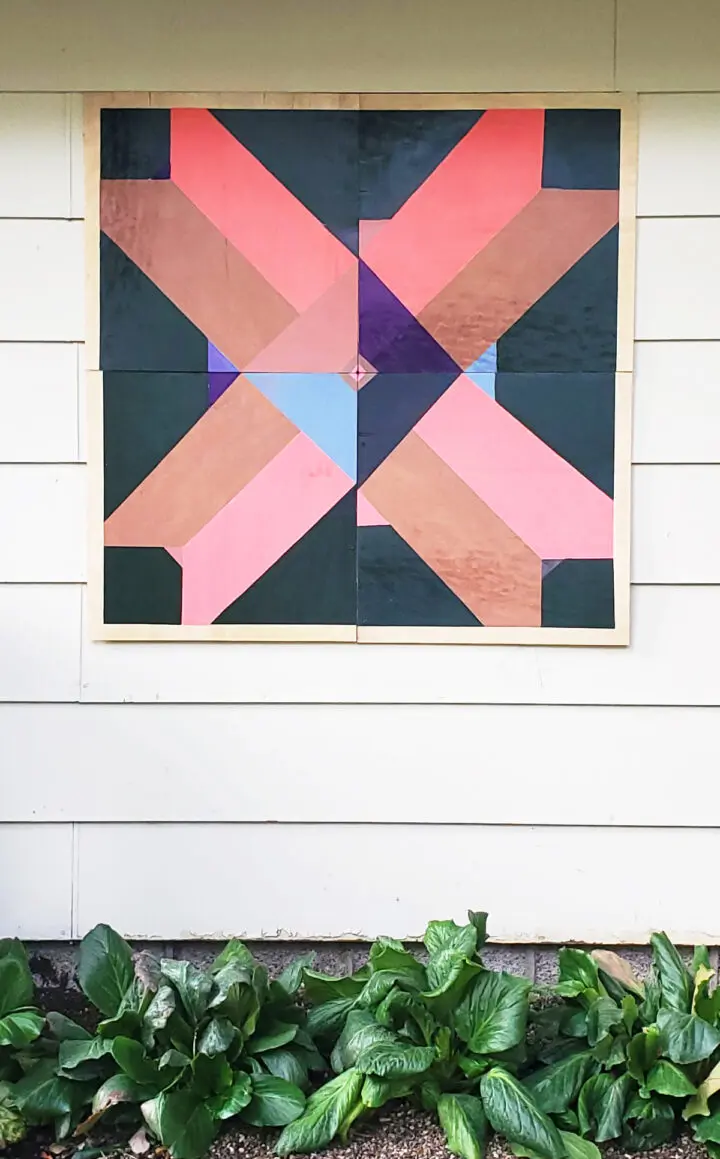
Barn quilts add a gorgeous and charming bit of art to the side of your garage, shed, or bar (of course!). This DIY Barn Quilt is made using 4 smaller pieces of plywood to create the large size making it much easier for anyone to make with simple tools. No need to haul a large piece of plywood!
Be sure to read the post for helpful tips & notes !
[cp_popup display=”inline” style_id=”54965″ step_id = “1”][/cp_popup]
This DIY Barn Quilt comes in under $30…
Other projects with a BIG IMPACT for under $30:
- Painted Dropcloth Rug ANYONE can make!
- Vertical Indoor Garden (from a shoe organizer)
- easy Homemade Candles
- easy DIY Photo display
- Guide to stencilling your walls
Supplies for DIY Barn Quilt:
- 4 pieces of 2′ by 2′ plywood squares (the link is what I used. Multiple kinds of woods would work, as well.)
- Painter’s Tape
- Exterior Paint (this is great for using up those leftover spray paints and opened exterior paints. Also watch for the clearance aisles!)
- Foam brushes (one for each color)
- clear Exterior varnish/polyurethane
- template (grab mine below)
- screws to hang it up (or other way you would like to fasten it)
Note: if you have a way to haul and hang a full piece of plywood…try creating your barn quilt on a full piece of plywood! You’ll get less warping of the wood over time because there are less seams to protect.
Full Disclosure: If you aren’t smart about your purchases and using paint/tape you already have you may run over the $30 price point I mentioned.
Instructions for DIY Barn Quilt:
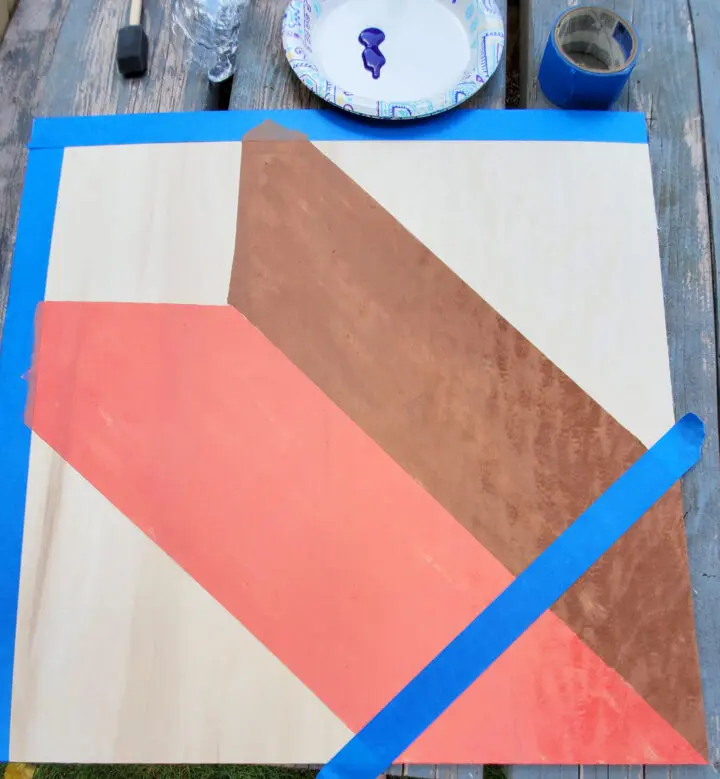
- Use the printable template and a pencil to sketch your design on to your boards. I find it easiest to use a ruler, brown bag, or other edge to get straight lines.
- Use painter’s tape to tape off your first section’s.
- Paint your first section with multiple coats for full coverage. Let the paint dry between coats (if you are working outside, this won’t take long).
- Repeat for all the sections.
- Seal with an exterior clear varnish. Let dry fully.
- Hang and enjoy!
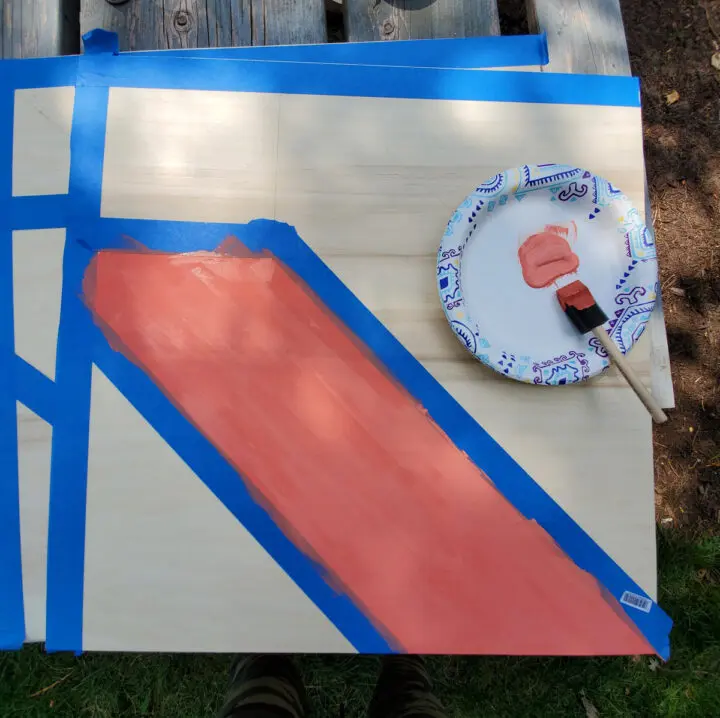
Start with the lighter of the two colors (it’s easier to cover a light color than a dark), tape of your section, paint several coats of paint until the wood is fully covered. Be sure to leave time in between coats for the paint to dry.
Tip: Paint each board with the color you are using to allow the paint to dry in between coats. When all the boards are done with the first coat the first board will be ready for that second!
It can be hard to keep track of what gets painted what. I recommend having a note in each section with the color you want to paint it (make it small) and laying the finished piece alongside the others to be sure it is how you intend to.
Move slowly and carefully if you are creating a complex design. Plan, mark, and take your time!
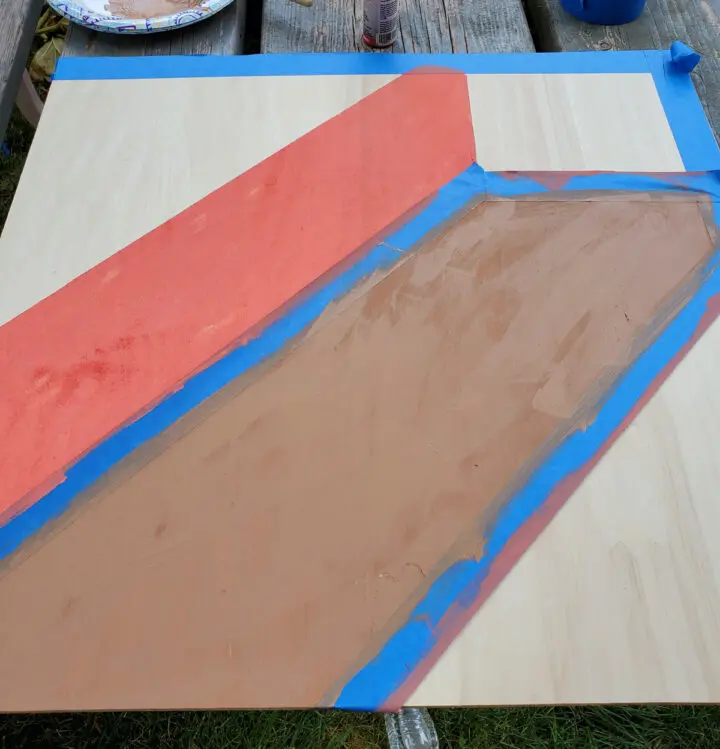
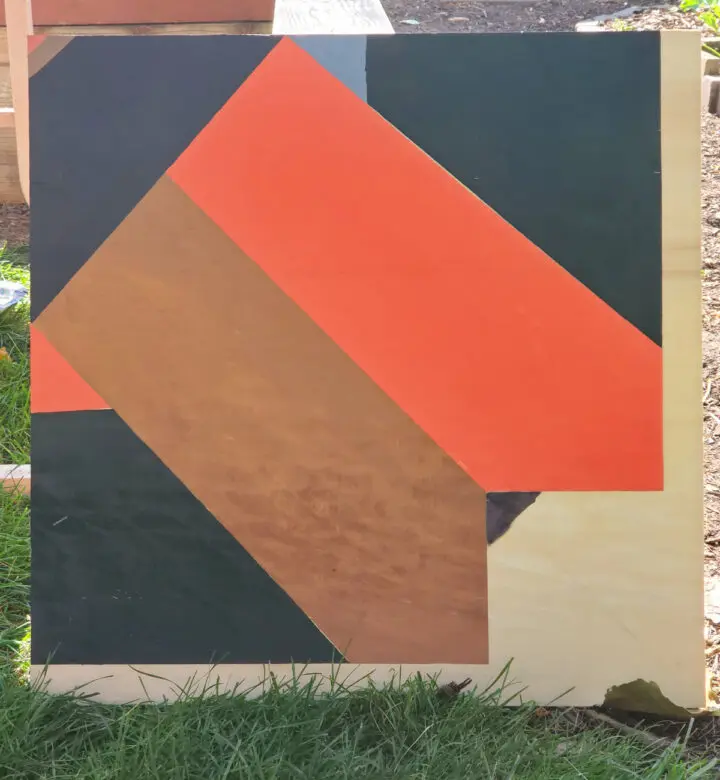
After the section has fully dried, move on to the next and repeat the process. Take your time, watch your plan, double check, and have patience. It’s worth it!
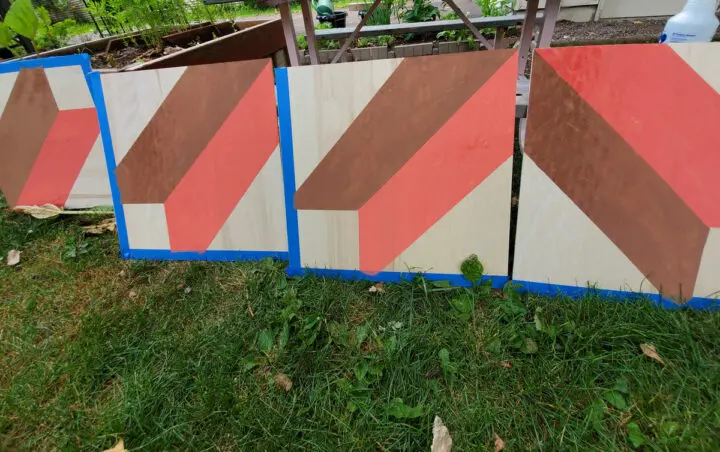
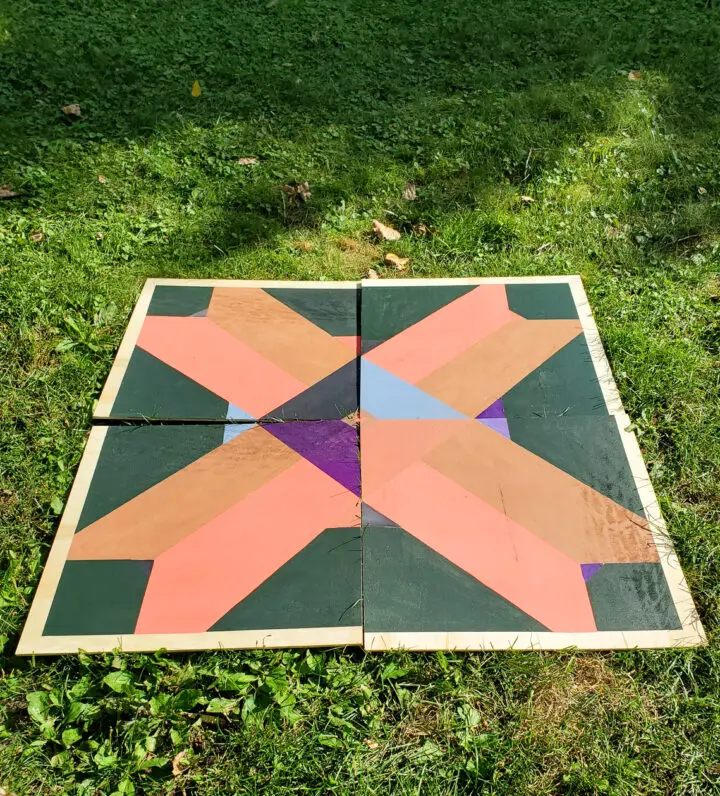
All four boards are done!
You’ll see that my design has a bit of randomness to it. That’s by design. You might prefer to have a symmetrical design — plan your colors accordingly. I prefer the relaxed and artistic feel of the random colors that don’t quite make sense. But make your DIY Barn Quilt how YOU like it!

Double checking that the boards line up, and how I want to proceed next. This is the basic shape and now I needed to decide if I wanted to paint anymore of the bare wood or leave it as is.
To create the center square we need to create the large triangle at the center of each board. This could be sectioned off at the very beginning and left unpainted (I recommend this if you would like to use a lighter color) or, like I have done with a dark color, sectioned off and painted last.
This is where you get artistic and add color as you see fit. I added a bit more color to the center triangles which, ultimately, creates the center colored squares of the design.
I painted all of the bare wood the dark green color to give the colored pattern even more impact, leaving the strip along the edge that had painter’s tape.
Remember after you have the initial design, it is up to you how you would like to continue. You can leave it as is –gorgeous! Or you can continue to add colored triangles and make the design more complex and colorful.
How big should a barn quilt be?
Most barn quilts are 8 feet square. Which is large enough to be easily seen from far away. But large enough to be difficult for the average person to manage. This DIY version keep the project easy with smaller 2 foot sections!
What kind of plywood do you use for a barn quilt?
Any kind of plywood works but I would recommend the smoother, better version to get the cleanest lines and painting. And…if you want your barn quilt to be down lower. Traditionally the barn quilts were high up on barns and didn’t need to be the fancy plywood.
How do you seal a barn quilt?
Exterior polyurethane/varnish in either spray or brush form (use what you have!) applied with multiple coats would be your best option. Be sure to coat your project multiple times for the most long-lasting effect. After all, you don’t want all you hard work to fade quickly!
Can I get your barn quilt pattern?
Of course! Head to the bottom of the post for full printable instructions and printable PDF of the quilt pattern.
Note: my pattern is designed to be used on the entirety of the boards. I added a strip of painter’s tape along the edge which gave it a bit of a different look and why it might appear that I used a different design.
How do I attach the barn quilt?
Honestly, I screwed mine in with 2 screws on each square. But I know that many of you wouldn’t want to do that. I would recommend outdoor Command Strips, or using simple brackets to connect the squares together and then adding a single screw to your wall.
See a version of the brackets I mean here .
Or this version.
A simple project to add much needed color and charm to the side of our tired garage. I’m loving this and planning on making a few to gift to friends. What a charming, simple, and inexpensive addition to your outdoor decor!
[cp_popup display=”inline” style_id=”54965″ step_id = “1”][/cp_popup]