Well guys, we are through another week of the One Room Challenge (be sure to check out the amazing other spaces!) and have made good progress in the entry/mudroom update.
We have…
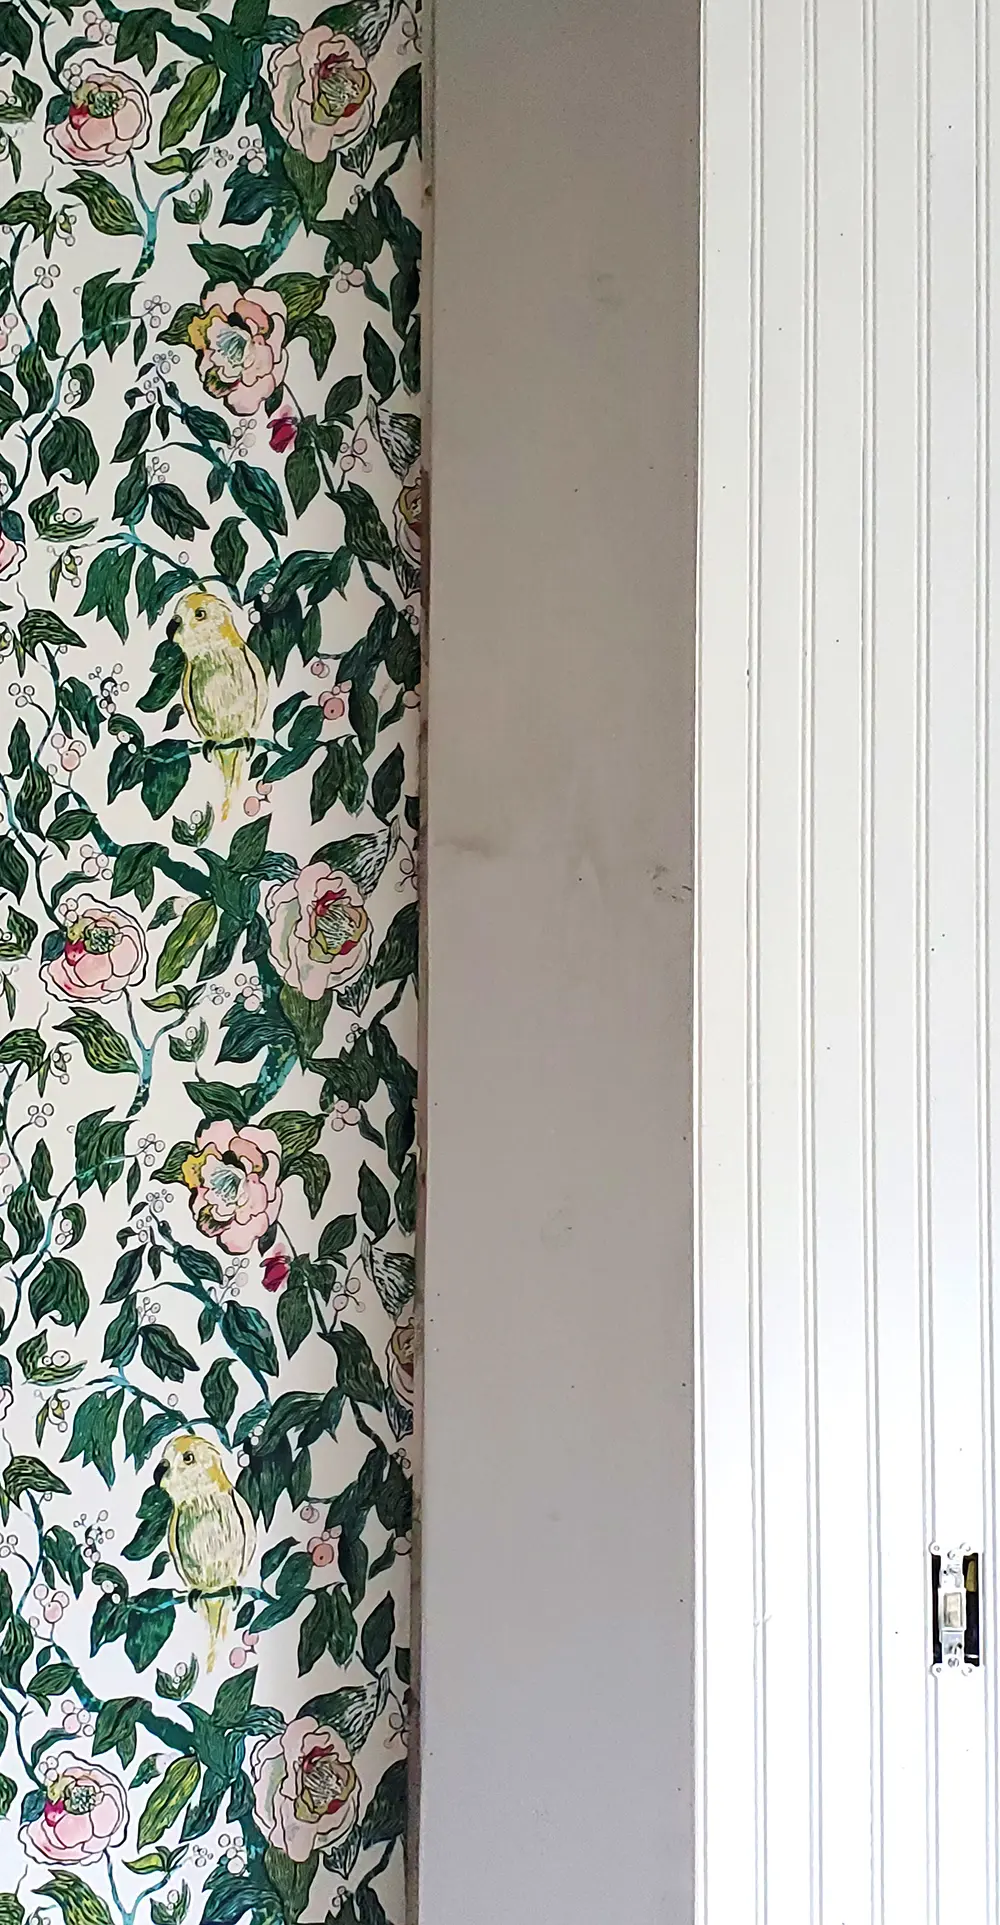
See Week One and the before pictures of this mudroom/entry space (uffda, they are pretty bad!)
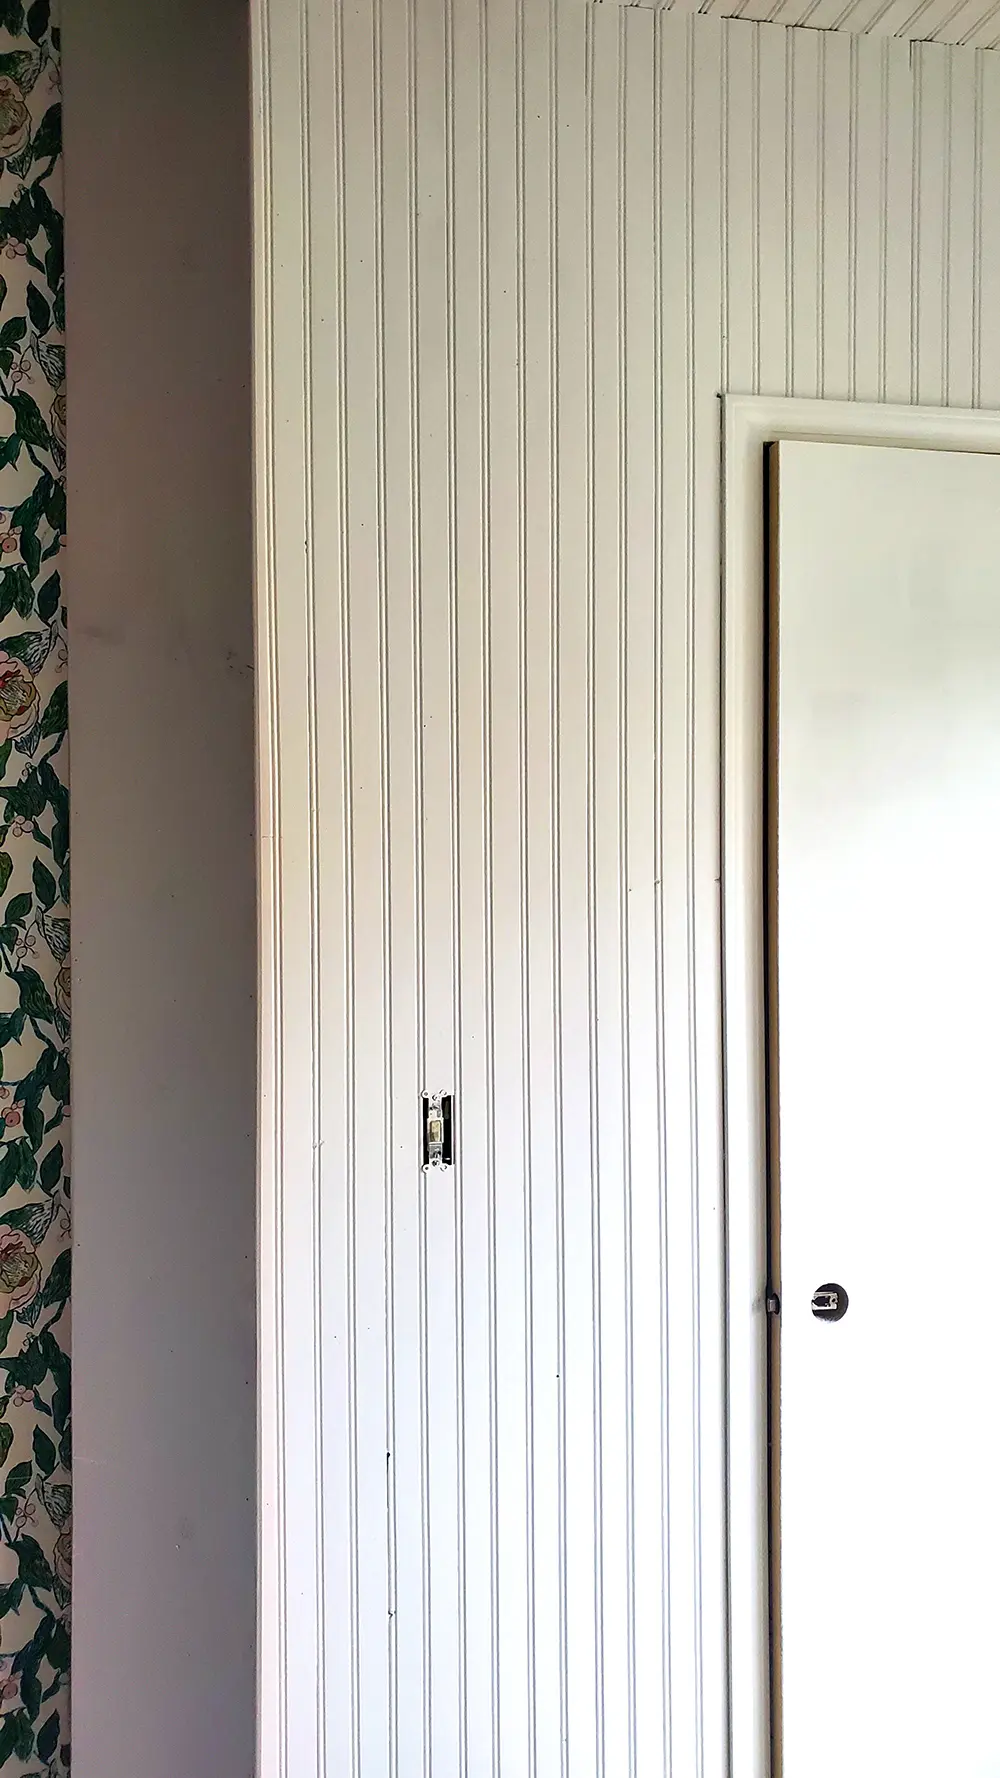
- A door. The worst part is that there should have been a door here all of the time so it doesn’t even feel like we did anything. Have you had that happen? Where you make an improvement that was so obviously needed it feels like you didn’t change anything.
That’s soo good, in some ways. Obviously adding the door was huge.
But dang, sometimes I want to FEEL like I made some channges. Ya know.
Tip: it can be very cost effective, if you have the tools, to buy an inexpensive slab door and add your own trim to it.
- Beadboard on the walls and ceiling. This was huge! We used beadboard to cover that darn popcorn ceiling and it felt soooo good. Those popcorn ceilings hold dust and dirt and just…ick. Now we have old-fashioned beadboard that just fits this 1880 home so well.
The beadboard we used is the tongue and groove, pine version NOT the MDF version. If you are trying to create an authentic, vintage look you MUST use the real version with the knots and imperfections. It’s a pain to paint all of that wood but completely and 1oo% worth the extra effort!
- That big beam framed in and painted, waiting on crown molding. It’s sooo much better! The dovetail gray is the same paint we’ve used on the accent trim throughout the house. It’s the perfect soft gray with just a tinge of purple. So pretty!
- Sherwin Williams Alabaster White on all of the beadboard, wall, and trim. And it looks sooooo good! This is my favorite white…fresh, creamy, and so pretty! I’ve used it all over the house although the dining room shows it off the best.
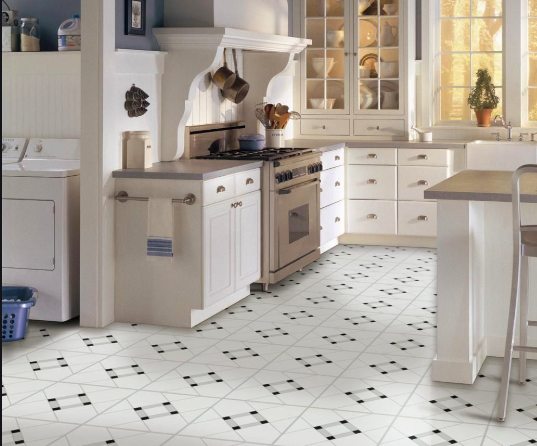
- Flooring picked out. I couldn’t be more excited to be working with Armstrong Flooring and using their Lattice Lane Vinyl Tile in black and white. I am so freaking excited about this pattern and color scheme in this space and in the kitchen. Watch for a tutorial on how to use inexpensive vinyl tile for a high-end look!
P.S. We used only a single gallon of Sherwin Williams Infinity paint for this. On un-primed wood! Which means it soaked up a TON of paint. GUYS! This paint is expensive but it saves soooo much time and energy that it is worth every extra dime. One gallon instead of two. 2 coats instead of 4. Worth it!
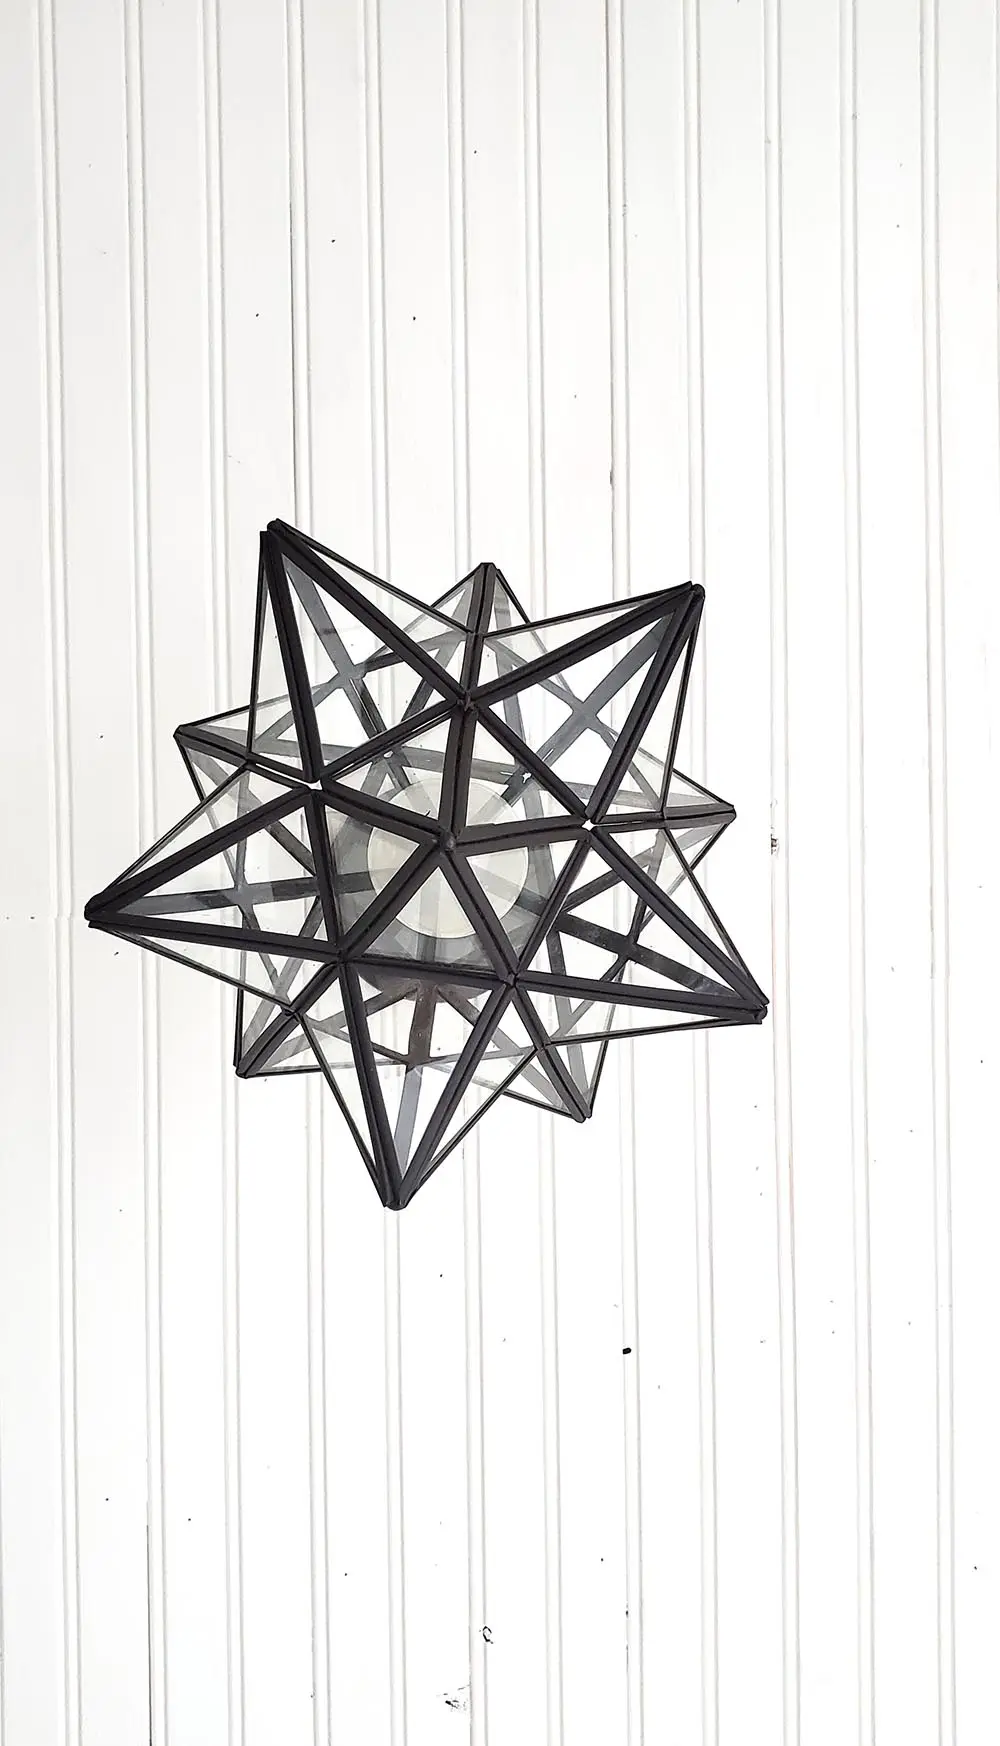
- Light is installed! We have this beautiful star shaped pendant light that I had picked out at least a year ago without any idea what we were going to do in the space. I just love it so! And gosh, I’m so glad I did. It’s so charming, isn’t it!
Now here is where we could use some help…
It’s time to choose the color for the cubbies, themselves. Reminder of what we are hoping to build. Something similar to this…
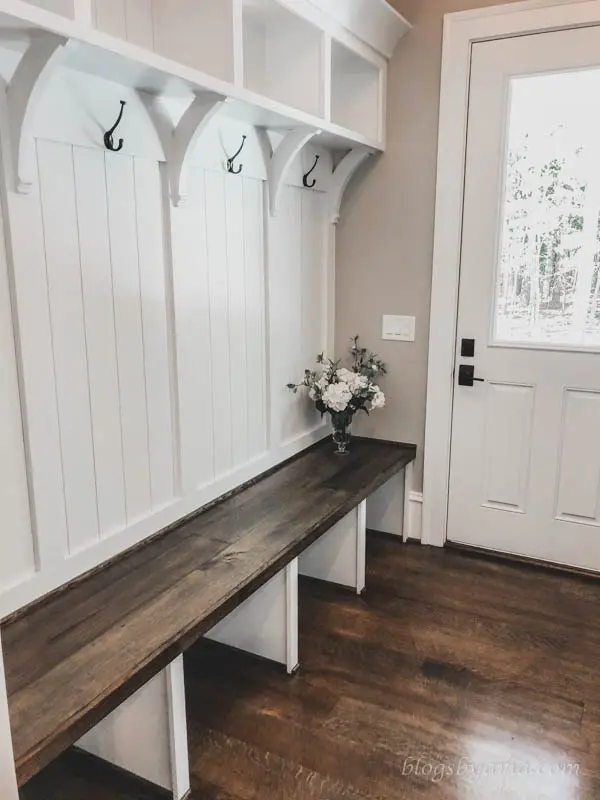

We need to choose the color of the cubbies. The choices we have narrowed it down to are forest green (similar to our kitchen cabinets) or baby blue. I through a gray in the mix for fun.
Tell me what YOU would choose. And stay tuned to see what color we ended up with!
Mudroom/Entry To-Do List:
- Install flooring
- Add trim and molding
- Build cubby’s
- Stencil wall
- Install wall light
- Decor