I have always had a love for March 2nd and Dr. Seuss’ birthday. I am an advocate for reading and the importance it has on our children’s desire to read and learn. Dr. Seuss’ birthday is always a great day in school’s and libraries to bring fun and reading to kid’s in new and bright ways. Of which, I cheer loudly! HOORAY! Bring on all of the Dr. Seuss’ crafts, treats, and fun! Like this Cat in the Hat handprint craft…
“If you never did you should. These things are fun, and fun is good.” ~Dr. Seuss
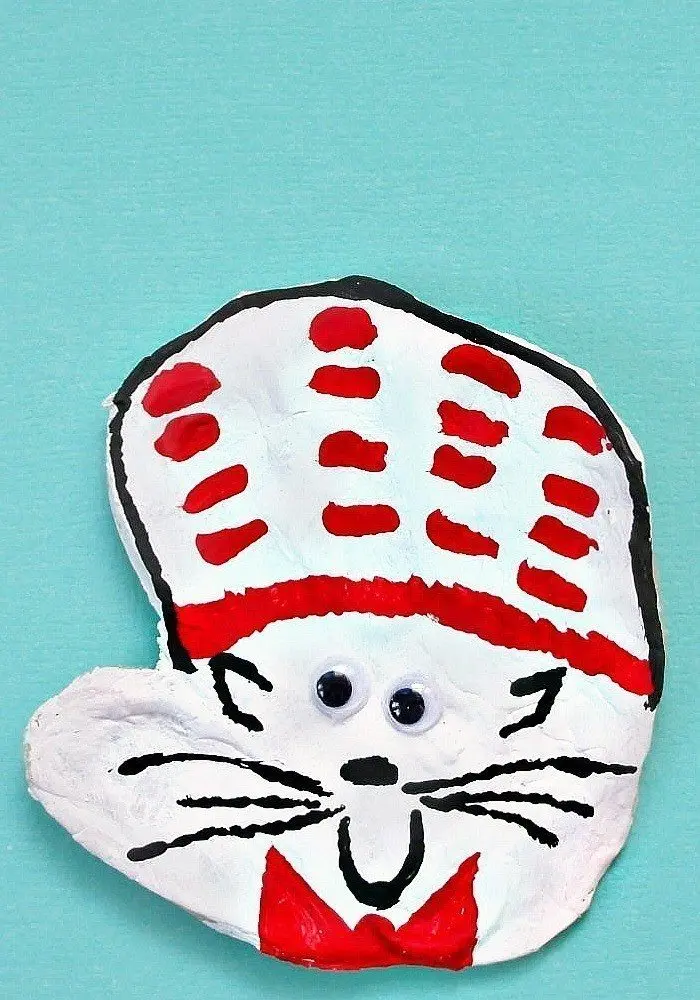
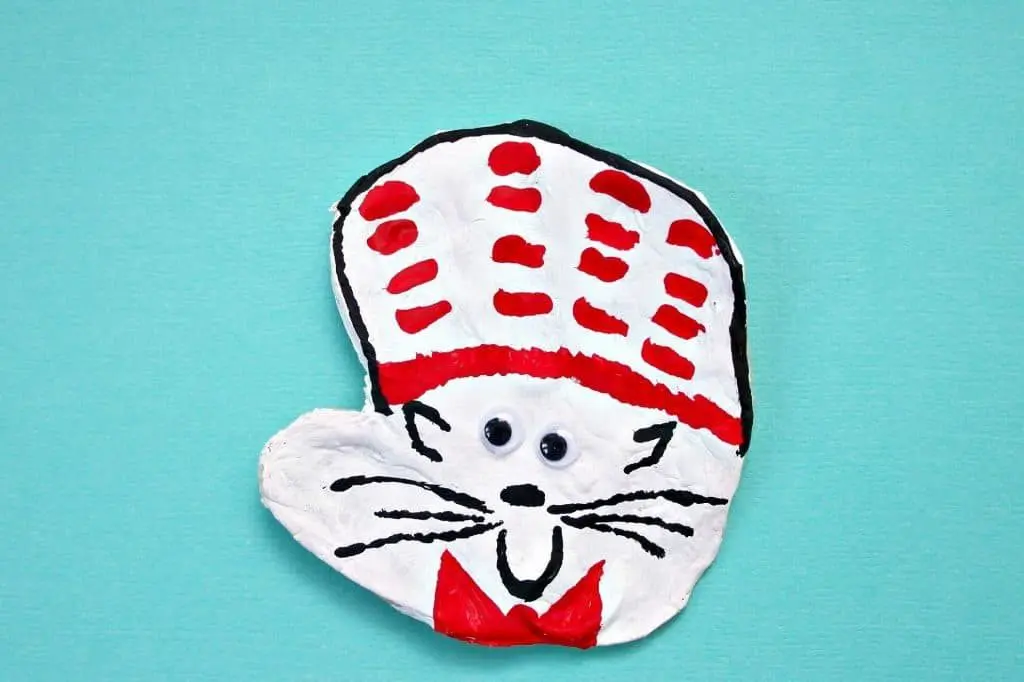
Fun IS good. And if you have never done a Cat in the Hat craft with your kids, you should. These things are fun. They get to press their hand into clay AND turn their handprint into the Cat in the Hat. Of course, involving paint and google eyes doesn’t hurt anything, either!
If you prefer to use Air Dry Clay instead of salt dough, try out my Air-Dry Clay recipe. I think you’ll love it!
Homemade Salt Dough Ingredients
1 cup flour
1/3 cup salt
1/4 cup warm water, plus more if needed
Instructions
Combine the flour, water and salt into a small bowl. Mix until a soft dough forms. If you find the mixture is
dry, add 1 tablespoon warm water at a time until a dough forms.
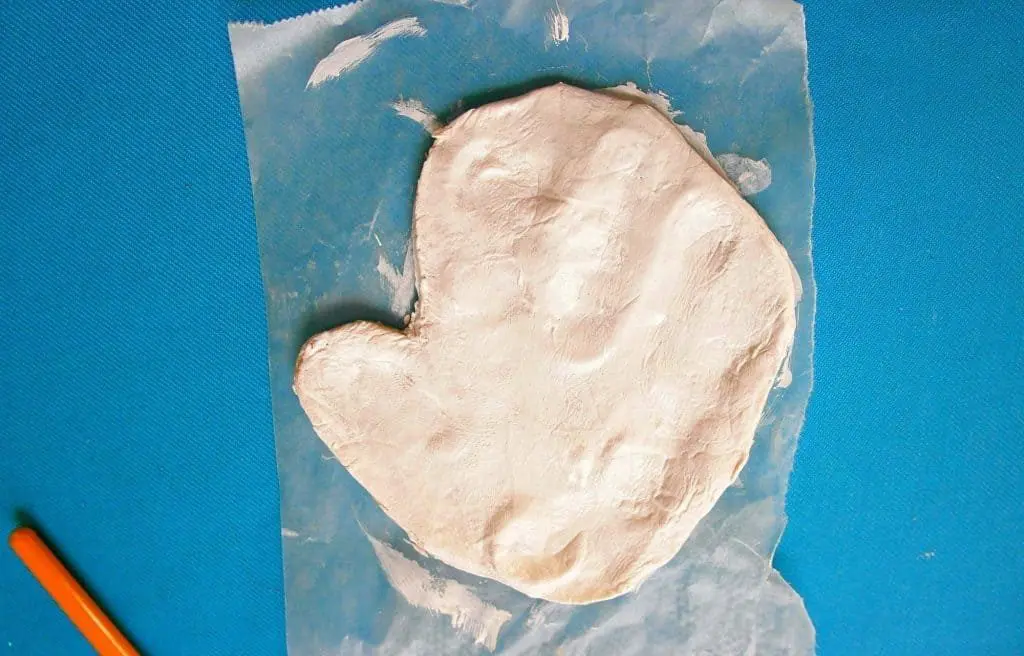
Roll out a large circle of clay just larger than the child’s hands and about 1/2 an inch thick. Have them press their hand into the circle (press firmly-help them if necessary) and trace around their hand. Trim the circle to reflect their hand print. Microwave for 10 seconds. Then 10 more seconds. Repeat for 20 seconds at a time until the dough hardens. Allow to cool.
Tip:
For ease of cleaning, put [easyazon_link identifier=”B0035JKE8Q” locale=”US”]wax paper[/easyazon_link]under the clay you are working with.
You could also [easyazon_link identifier=”B001GIB3FQ” locale=”US”]purchase clay[/easyazon_link] from a craft store. Follow the instructions.
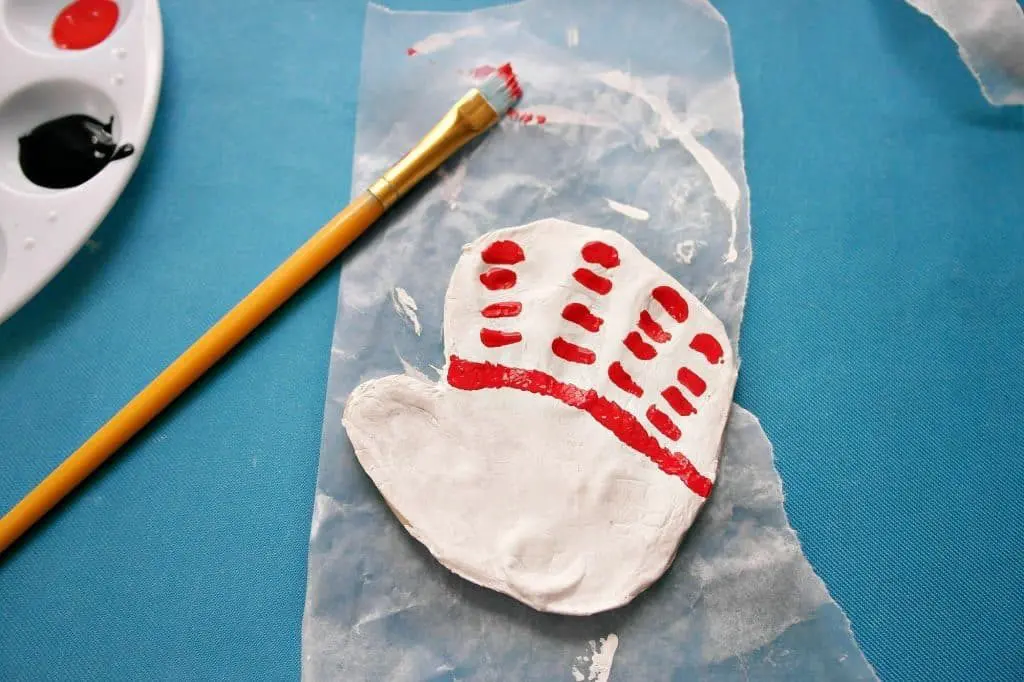
Get out the paint!! yahoo! At the bottom of the finger imprints have them draw a red line. Then, they should draw little red stripes where their fingers are. Good job!
Tip:
- Throw an old-t-shirt or button-down (backwards) on kids to help protect their clothing from the paint.
- If you like, you can have the kids paint the entire piece of clay white before they start. For older kids, this is recommended (remember to wait for it to dry before moving on!). For younger kids, they may not have the patience to achieve this step and the natural clay color is just fine.
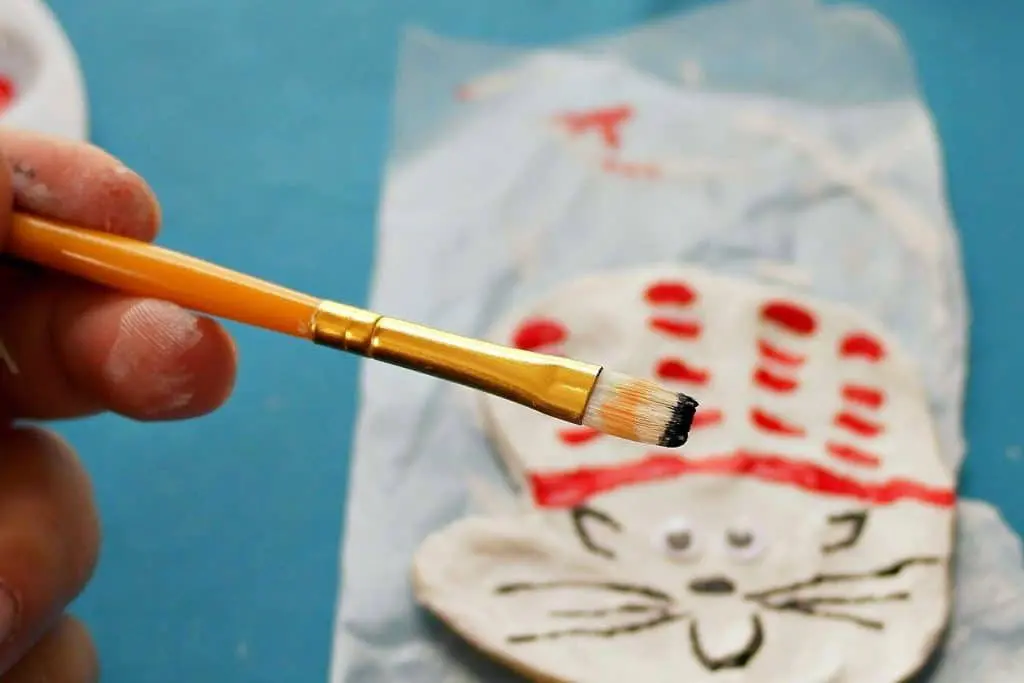
The face is done with black paint, of course. If you like…pull out a Sharpie! Sometimes Sharpies are a bit easier to control. But be warned…they don’t wash off kids as easily as paint. You might have a Dalmatian for a kid :).
Have them put a nose in the center of their “palm”. Then draw whiskers from the nose out. Three for each side. Now ask them to draw the shape of a large U under the nose, for the mouth.
Get out the google eyes!! Instruct the kids to put two google eyes above the nose and whiskers.
Tip:
It may be necessary to add a bit of glue to the back of the google eyes if they aren’t sticking properly.
For young children, it may be best to have them do the nose and eyes and allow you to do the remainder of the face. Or, sketch it out with a pencil and allow them to follow the lines.
After they have placed the google eyes take out the black paint one more time and instruct them to draw two upside down V’s on either side of the eyes. These are the ears.
The face is done!
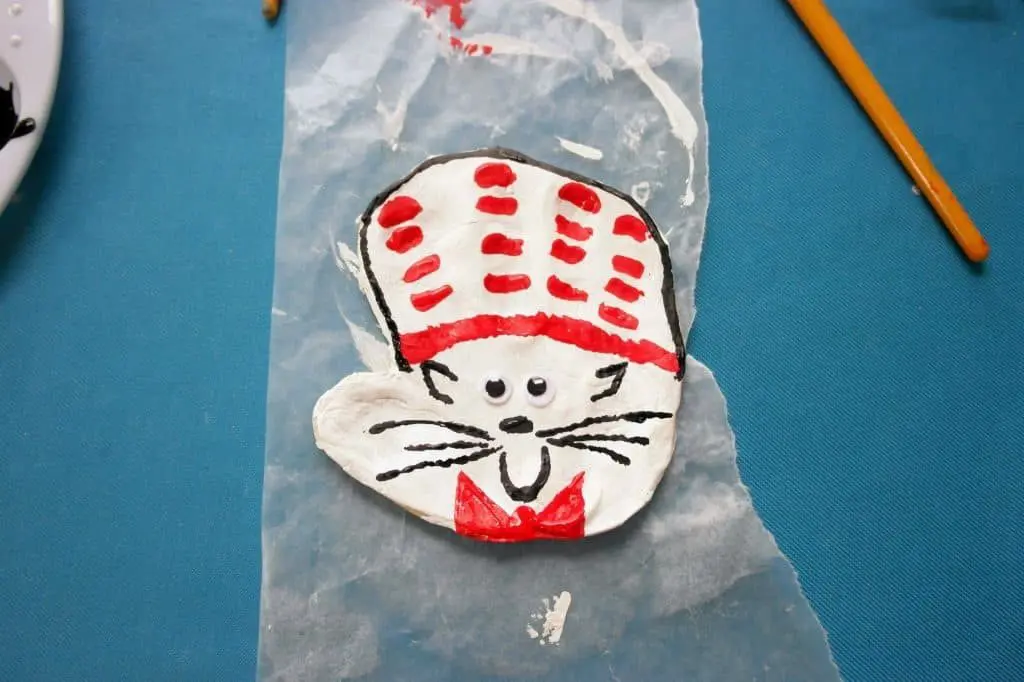
Finish off the Cat in the Hat craft with a red bow.
Instruct the kids to large red dot directly under the U of the mouth, at the very bottom of the clay craft. This is the center of the bow. Now ask them to draw two triangles on either side. This makes up the bow.
Tip:
For some children, this triangle shape is unknown and you may want to sketch it for them. Simply use a pencil to give them an outline to follow with the paint.
“It is fun to have fun but you have to know how.” ~Dr. Seuss
But, now you know how to have fun with clay and paint!! This is a cute project to celebrate Dr. Seuss’ birthday March 2nd.