Here’s something I don’t talk about much yet (but I will, I promise). I spent some time last year deep in the process of auditioning for a national cooking competition. Videos, callbacks, producers, the whole thing. The kind of process that starts feeling very real, very fast.

This post contains affiliate links. If you purchase through them, I may earn a small commission — at no extra cost to you. I only recommend things I actually use.

I’ll tell you the whole story another time. It deserves its own post.
But here’s what you need to know for right now: this wasn’t a home cook competition. Professional chefs, social media food creators, and home cooks all thrown in together, competing head to head. Three very different worlds in one kitchen.
I would have been going in as a social media chef.
Which sounds great until you start thinking about the challenges. Because at some point, a competition like that is probably going to ask you to cook your food. The dish that represents you. Your signature. Your whole deal.
And my whole deal is Midwest food. The signature dish of all Midwest mom’s: tater tot hotdish.
I’m a Midwest food blogger. That’s the honest answer. And I love that answer. But I also knew that walking into a high-pressure kitchen challenge with a can of cream of mushroom soup wasn’t exactly going to turn heads.
So I did what any completely reasonable person would do. I panicked a little, and then I got to work.
I built a deconstructed version: short ribs braised low and slow until they were falling apart, fresh green beans, and homemade tater tots that I made from scratch, over and over, until they were exactly what I wanted them to be.
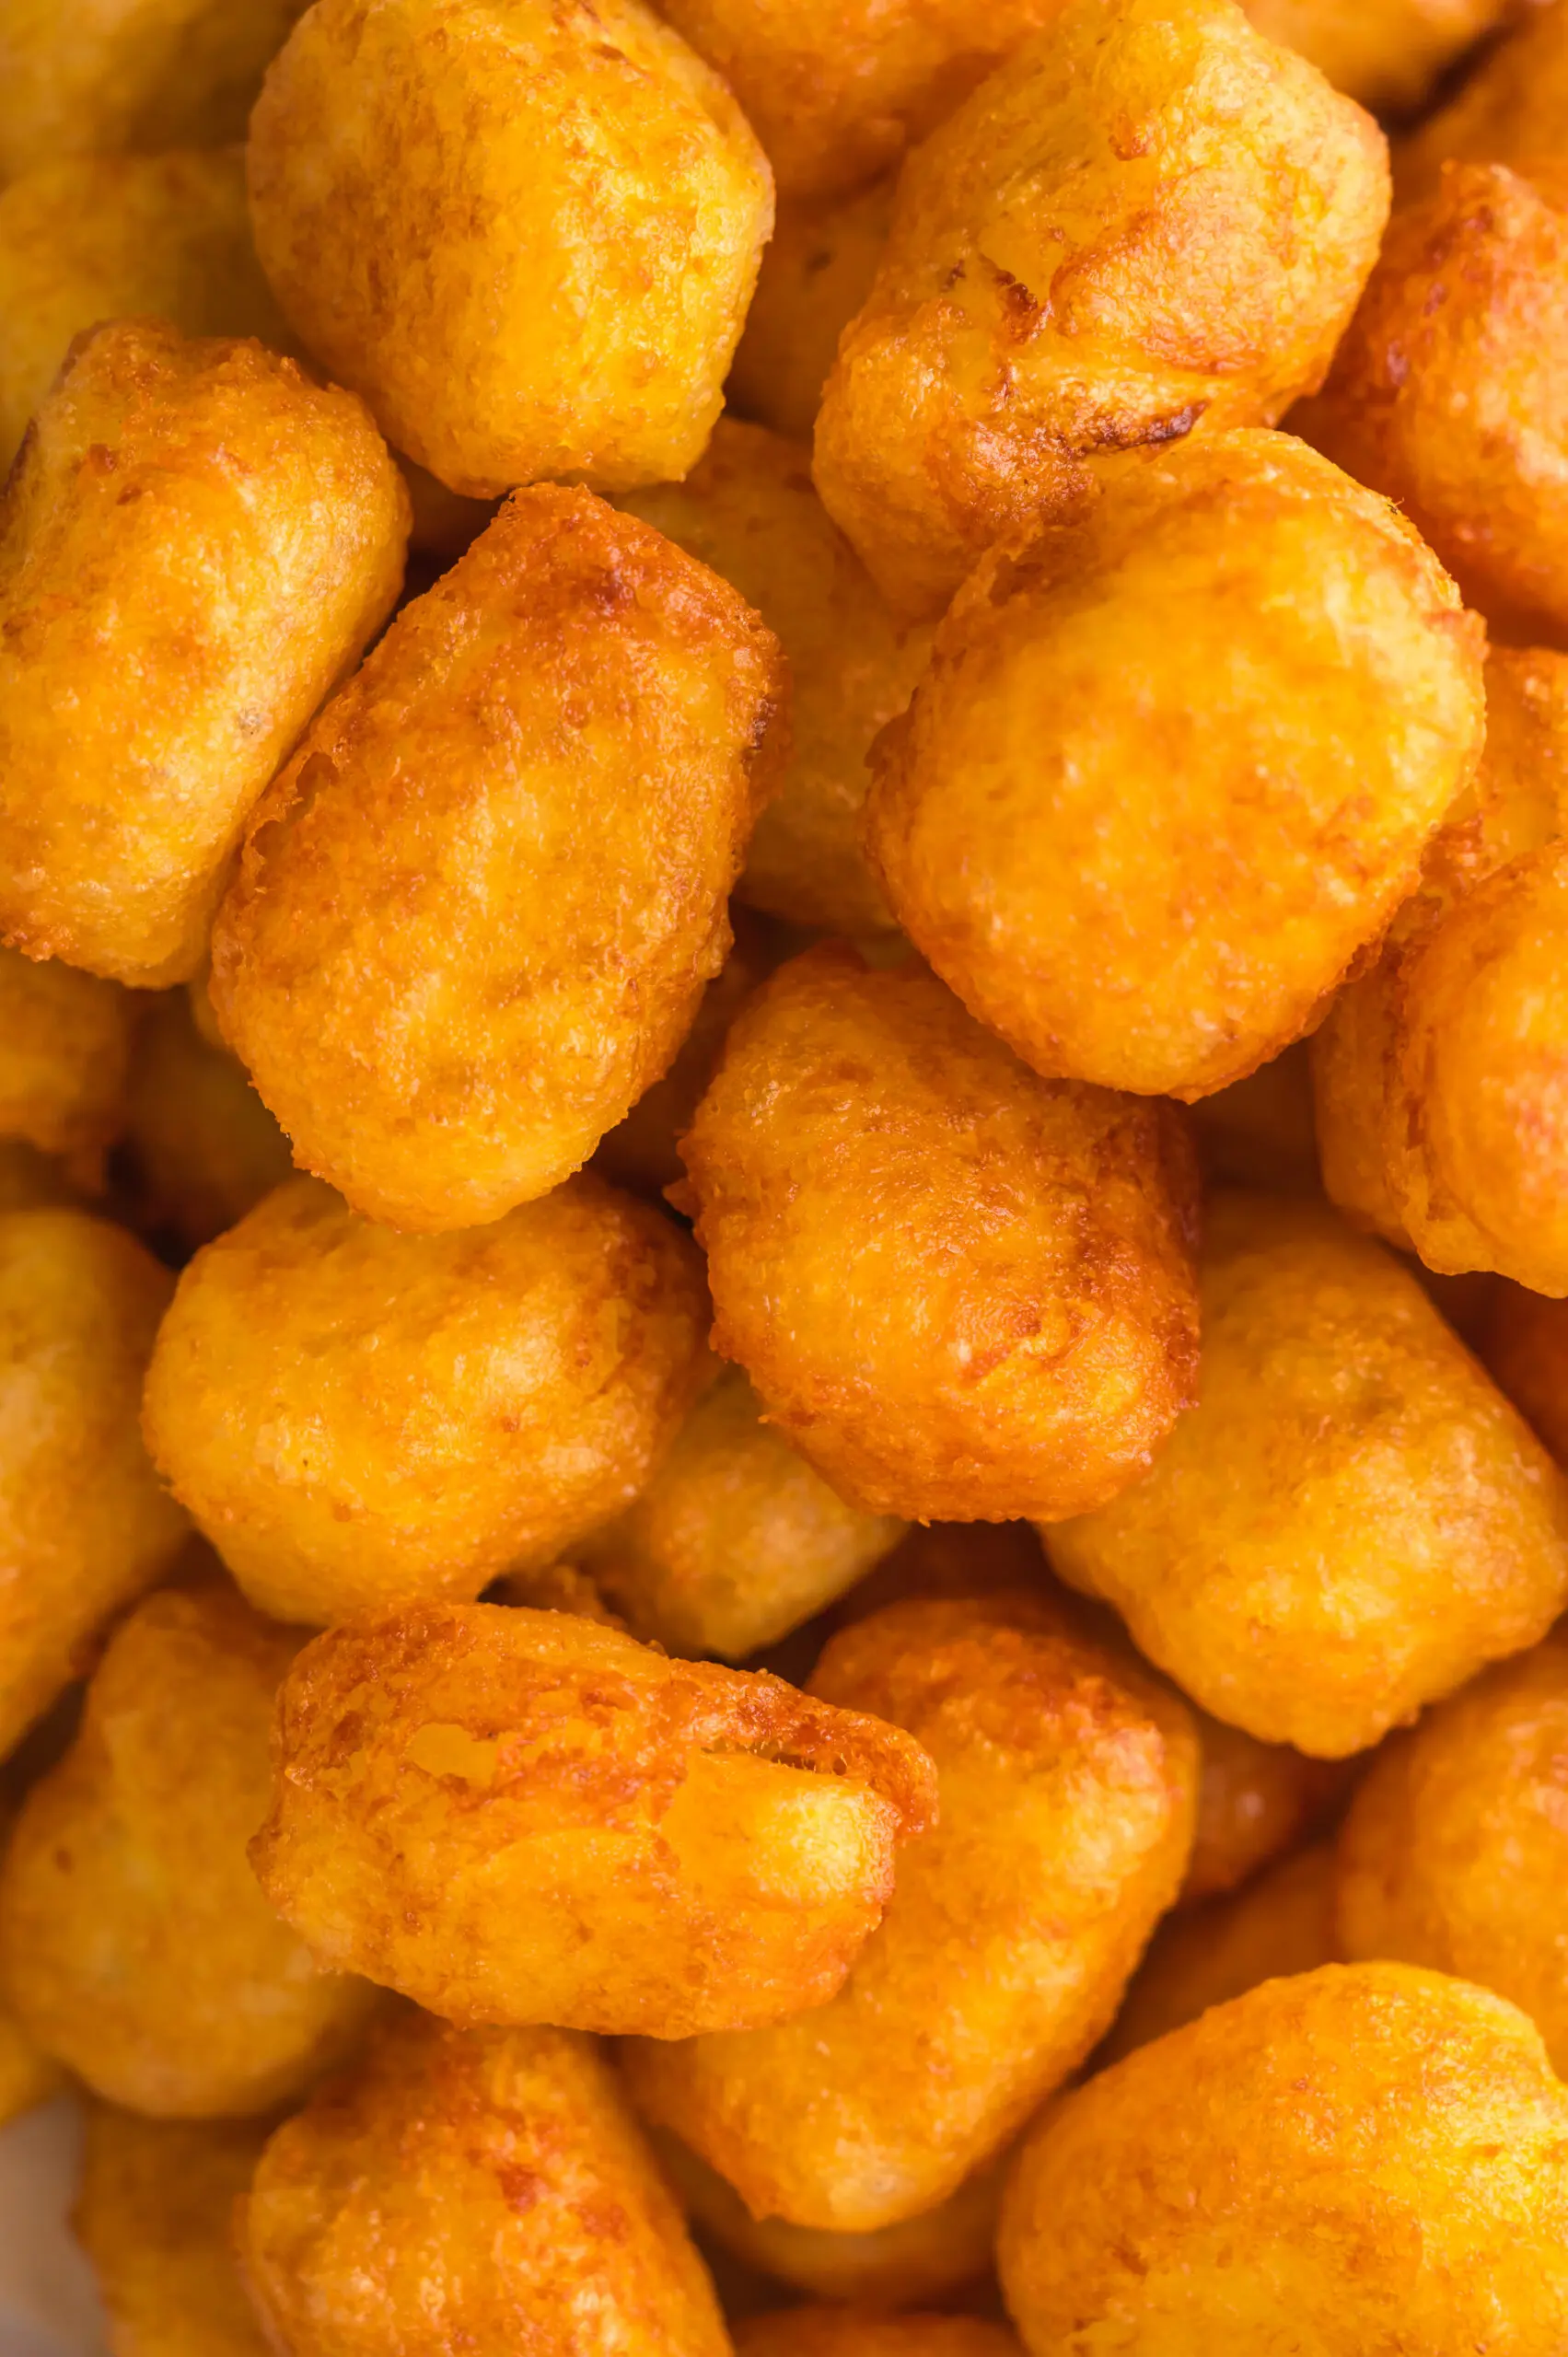
And those homemade tater tots? They ended up being one of the best things to come out of the whole experience.
Crispy shell. Creamy, garlicky center. The flavor of the tater tot you grew up eating, made from scratch in your kitchen with ingredients you already have. Once you make these, the freezer bag version is never quite the same.
These are those tots. Let’s make them.


What You Need to Know Before You Start
One thing I want to be upfront about: these are a weekend project. Between boiling, cooling, shaping, and frying in batches, you’re looking at close to two hours start to finish. But here’s the thing. They freeze beautifully, so you’re really making a big batch once and eating well for weeks. Totally worth it.
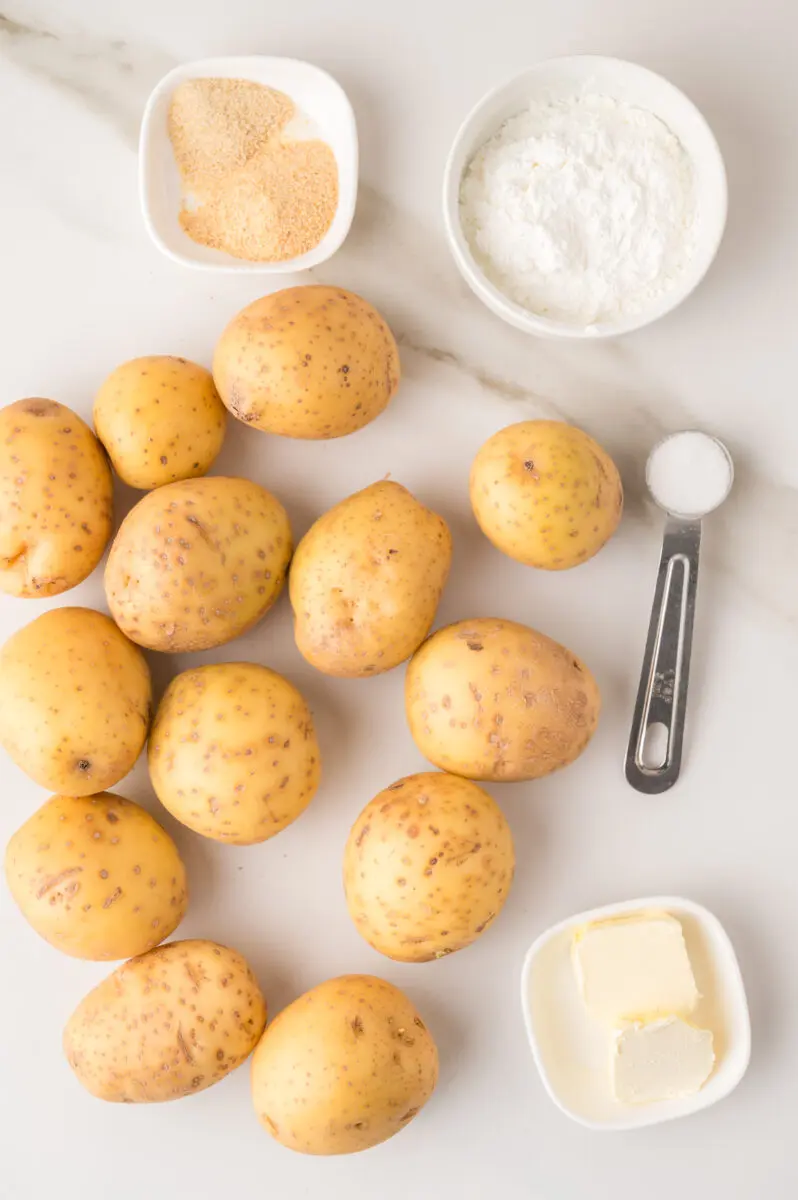
Golden potatoes only. I tested this recipe with golden potatoes and russet potatoes, and golden potatoes is where I stayed. They have the right starch content and a naturally buttery flavor that makes these taste incredible.
Don’t skip the cornstarch. I know it seems like a lot. Don’t reduce it. The cornstarch is doing real work here, pulling the excess liquid out of the potatoes so your tots hold their shape and get that crispy golden brown outside instead of going soggy. Trust the cornstarch.
Don’t over-beat the potato mixture. The instinct when you’re using a hand mixer is to go until it’s perfectly silky. Resist that. A slightly textured mash is what gives these the classic tater tot texture. Over-mixed equals gummy tots.
Wait for the oil. Cold oil is the enemy of a good tater tot. Let it heat fully before you add them. You can test it with a single tot or a drop of water. If it sizzles, you’re ready to go.
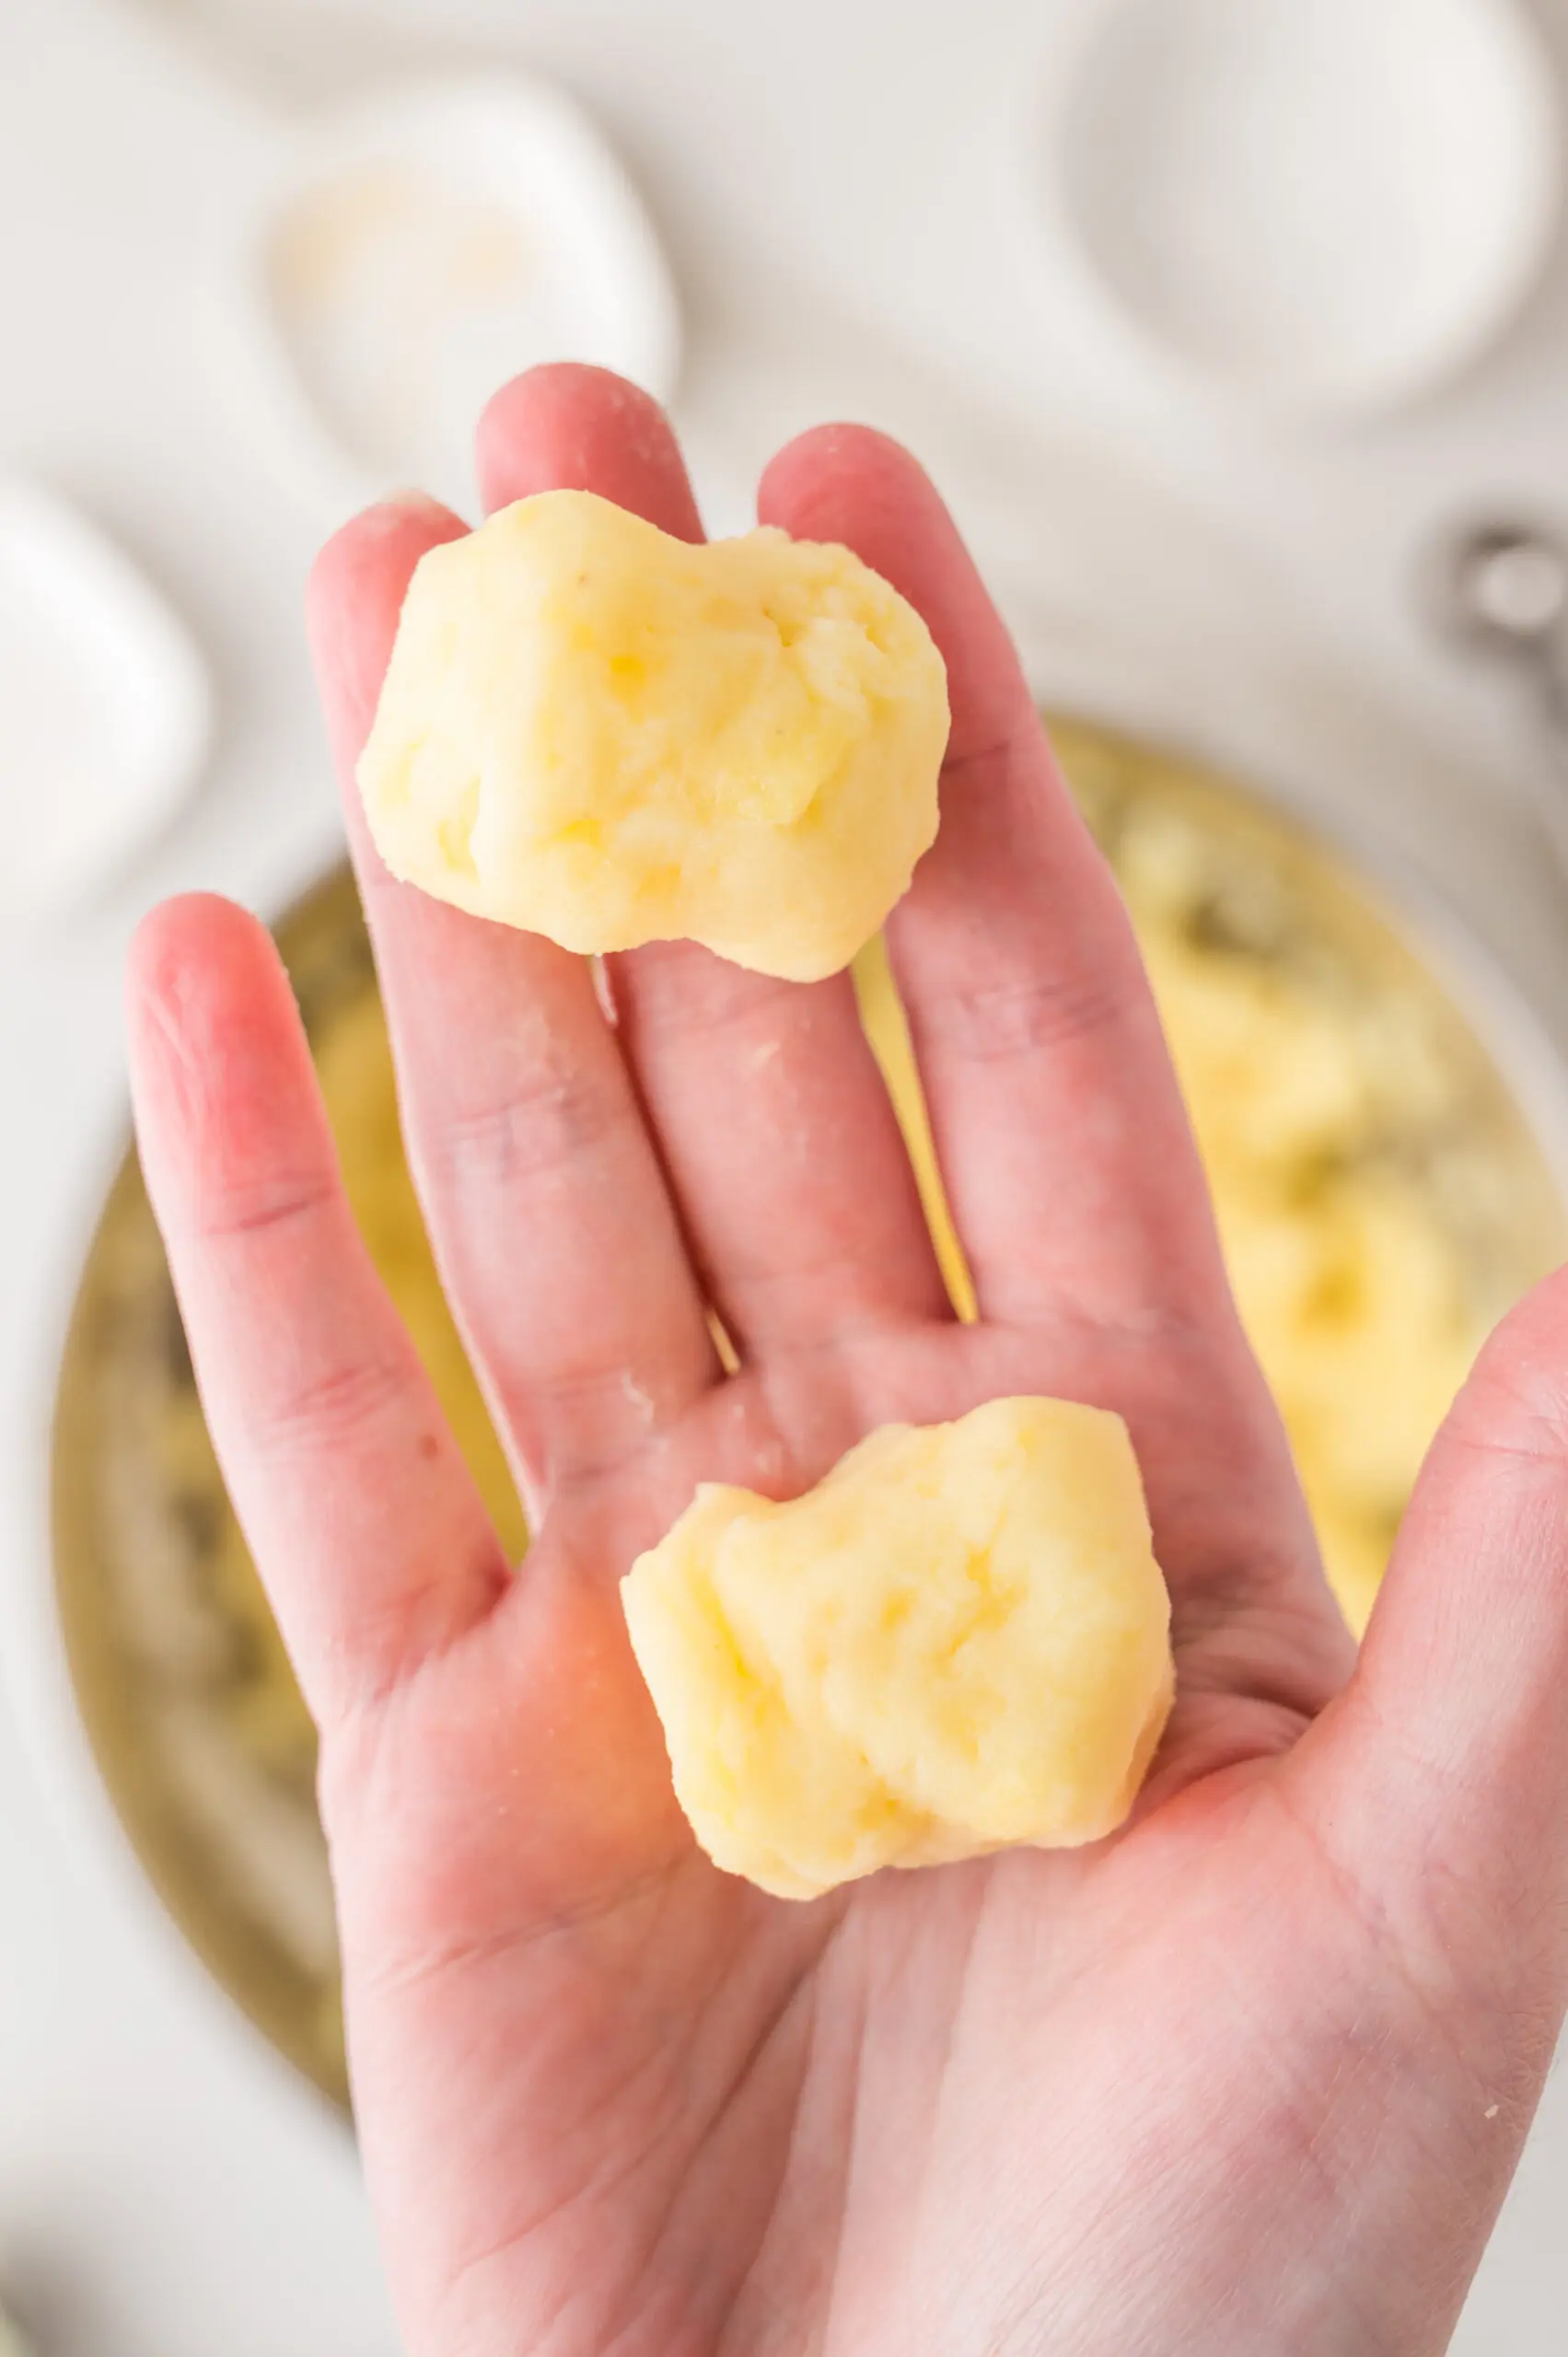
Wet hands are your friend. The potato mixture is sticky. Slightly damp hands when you’re shaping them makes the whole process so much easier. Just a little water. You’re welcome.
Pan recommendation and I will not be taking questions: cast iron. This Lodge skillet is affordable, basically indestructible, and gets tater tots crispier than anything else I’ve tried. It’s been a workhorse in my kitchen for years.
How to Freeze Homemade Tater Tots
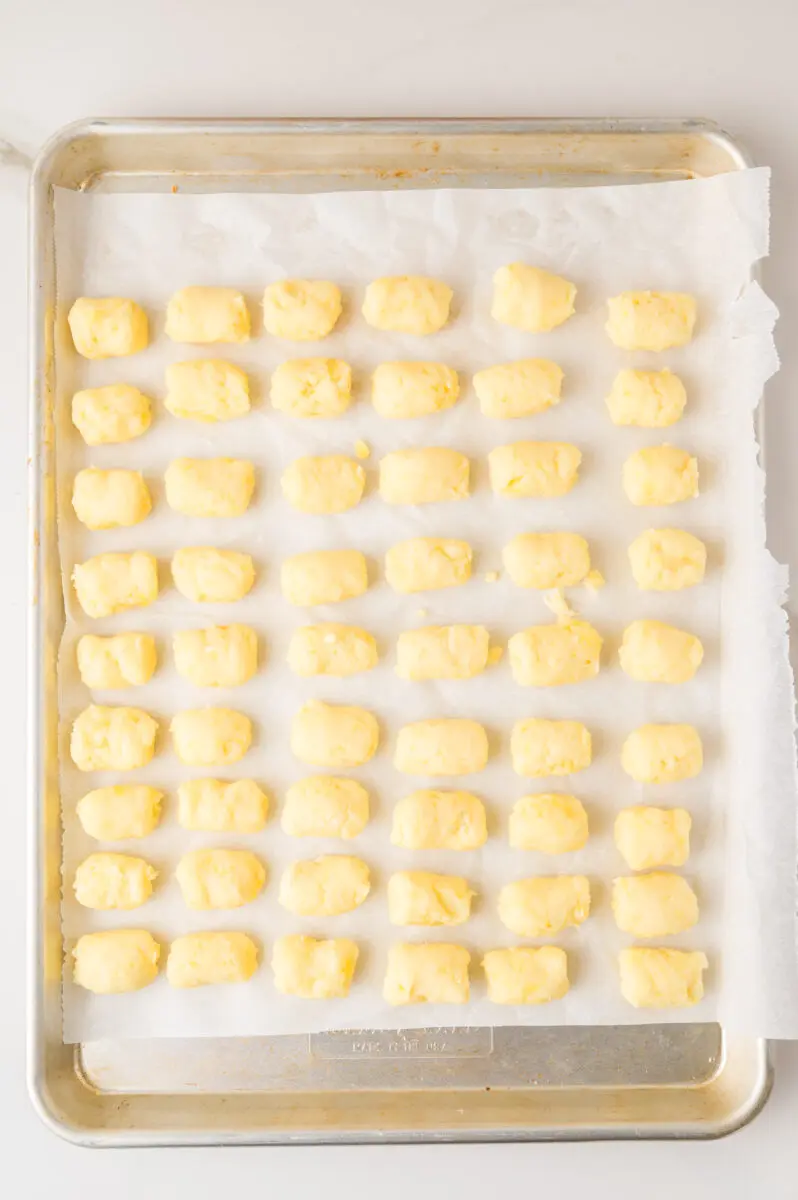
Freeze before frying : shape your tots, place them in a single layer on a parchment-lined baking sheet, and freeze until solid (about 2 hours). Then transfer to a freezer bag or airtight container. Fry straight from frozen, adding a couple extra minutes to your cook time.
Freeze after frying : let the cooked tots cool completely, then freeze in a single layer before transferring to a bag or container. Reheat your frozen tots in the air fryer or oven at 400 degrees until heated all the way through.
Either way, you can freeze tater tots for up to 3 months.
Real talk — a good air fryer is the secret to leftover tater tots that taste like you just made them. This https://amzn.to/43pezTP is the one I use. It’s small enough to not take over your counter and inexpensive enough to not require a conversation with your husband about it.
Worth Every Minute
I went through several versions to perfect these fried tots… more than I’ll get into today. But every batch I made taught me something, and this recipe is the result of all of it.
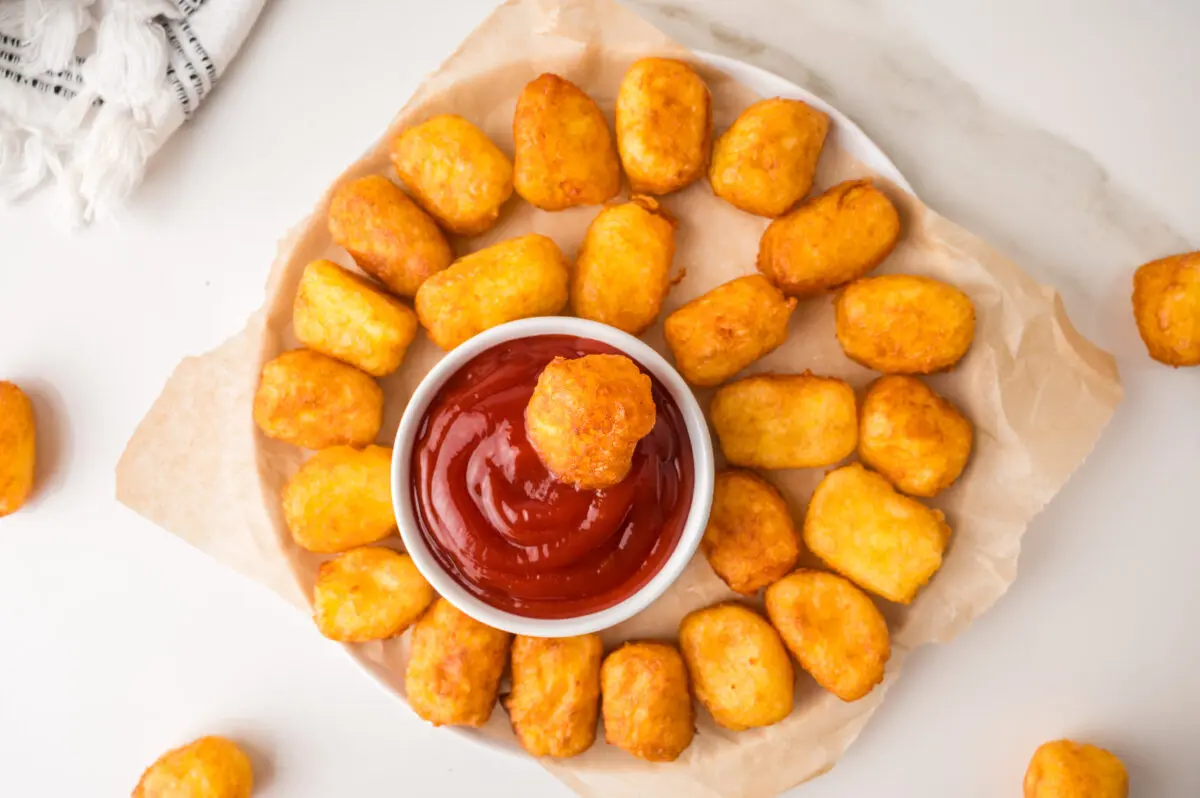
Crispy, creamy, slightly salty, warmly garlicky. The tater tot you grew up with, made from scratch by you in your own kitchen. Serve them with breakfast, serve them as a snack, serve them next to literally anything – they will not disappoint.
Make them. You totally got this! ~Nellie

Homemade Tater Tots Recipe
Ingredients
Method
- Boil the potatoes: Peel and dice your 2 pounds Golden Potatoes, peeled and diced, then add them to a large pot of water. Bring to a boil and cook until fork-tender, about 15–20 minutes 20:00. You want them soft all the way through.
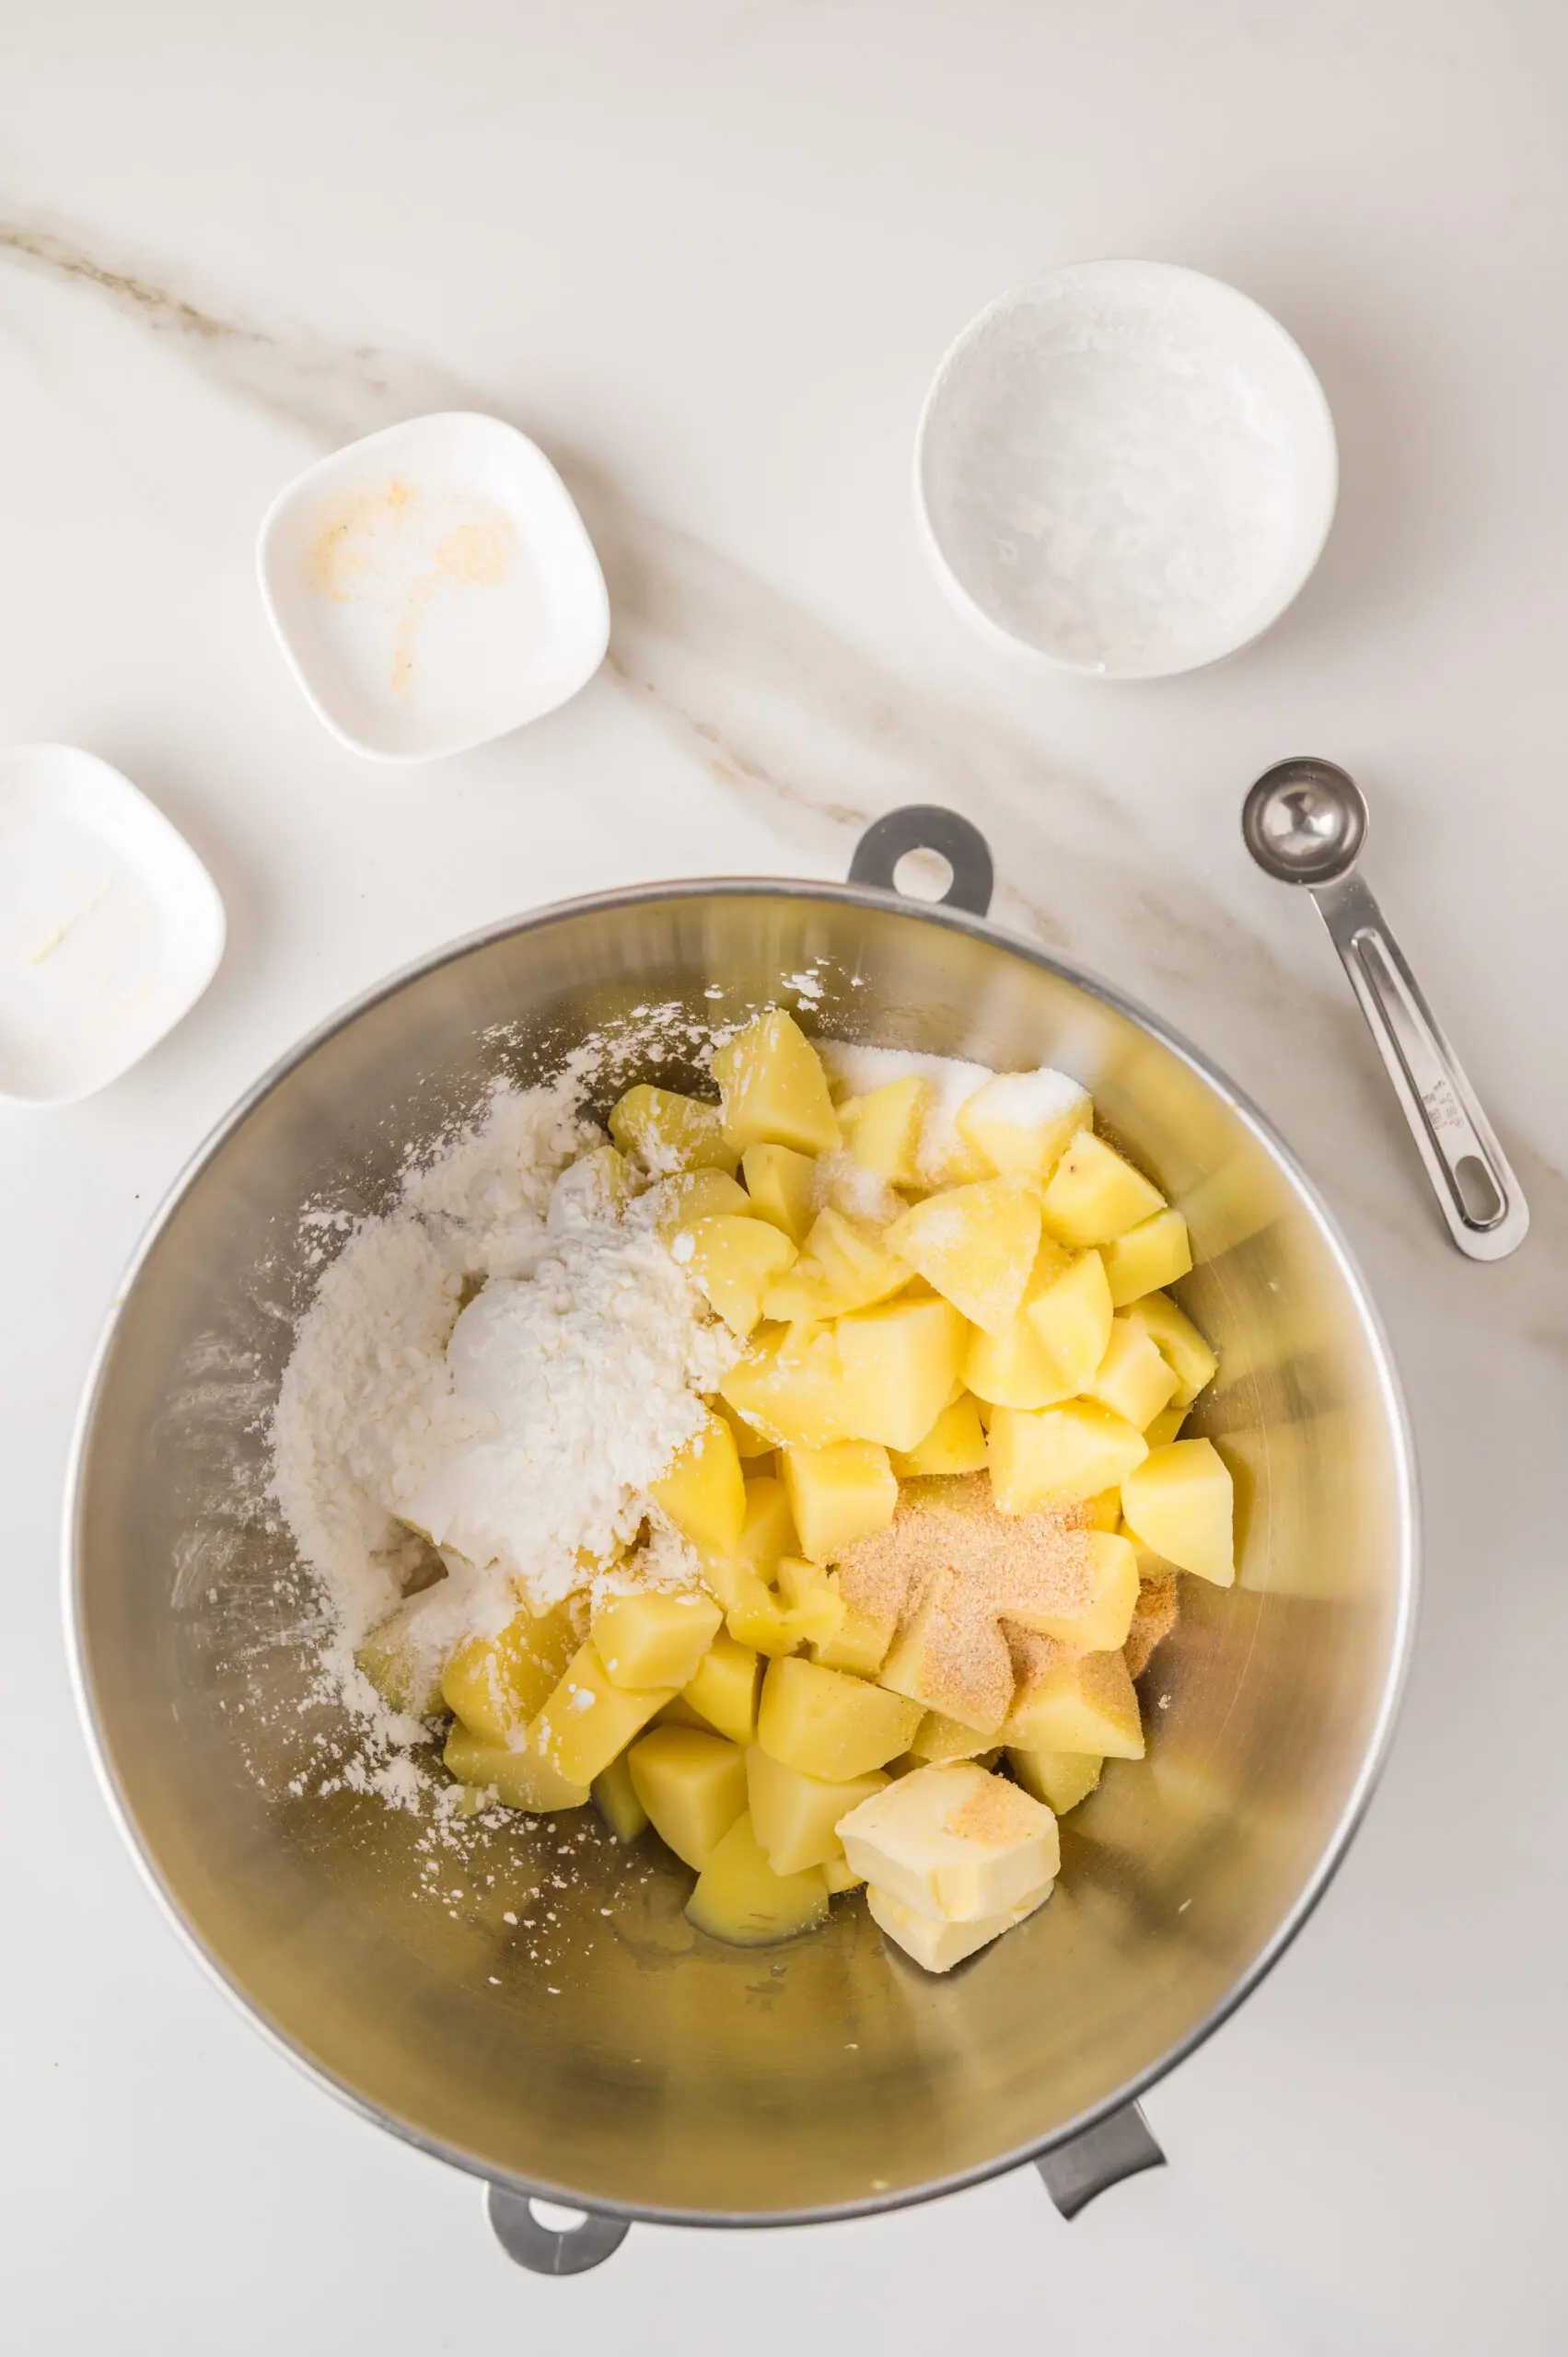
- Mix the potato dough: Drain the potatoes and add them to a large bowl along with the 1 teaspoons Salt, 2 tablespoons Unsalted Butter, 0.3 cups Cornstarch, 1 teaspoons Garlic Powder, and 0.5 teaspoons Onion Powder.

- Beat with a handheld mixer until just a bit chunky — but don't overdo it. A little texture is good here. Let the mixture cool until it's comfortable to handle.
- Shape the tots: Scoop about 1 tablespoon of the potato mixture and shape it into a classic tater tot cylinder. Slightly wet hands help keep the mixture from sticking. Place each one on a parchment-lined baking sheet as you go. Repeat until you’ve used all the mixture.
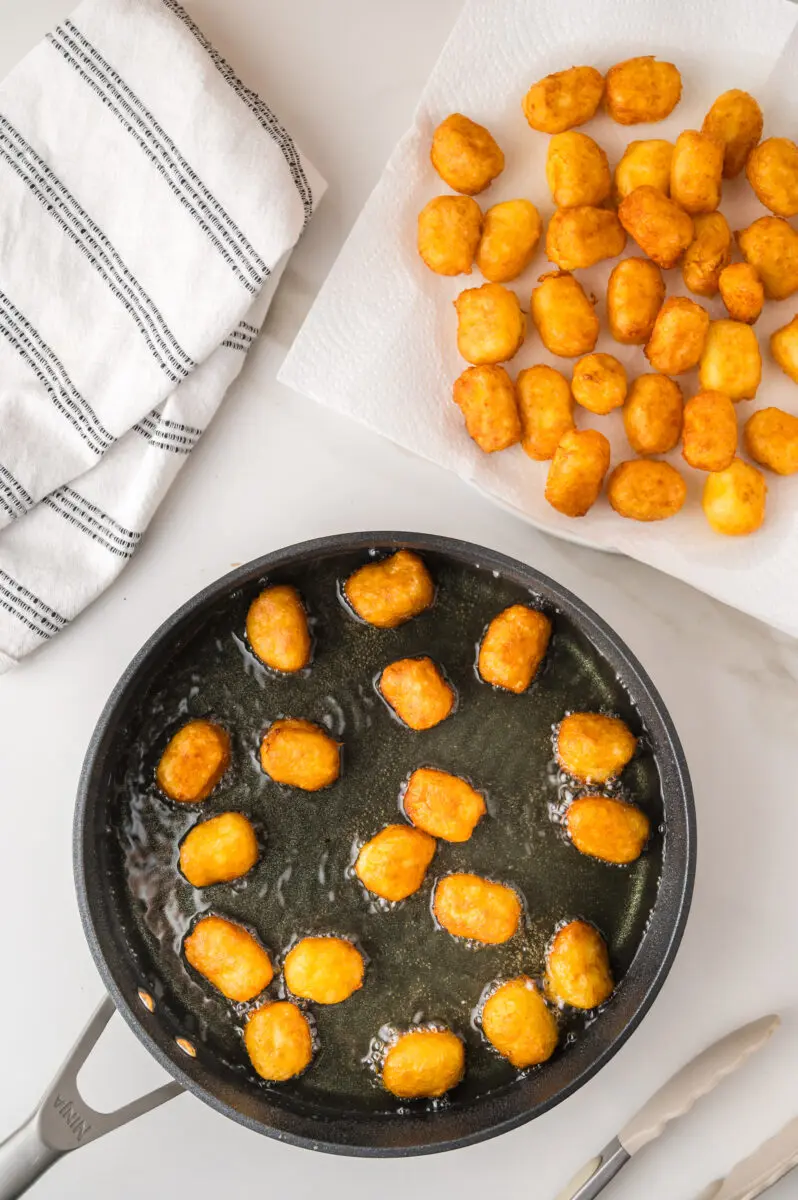
- Heat the oil: Pour about 1 inch of 1 Vegetable Oil, for frying (about 1 inch deep in your pan) into a large skillet or pan and heat over medium. Test the oil by dropping in a single tot or a drop of water — if it sizzles right away, you’re ready. Don’t rush this step.
- Fry in batches: Add enough tots to fill the bottom of the pan without crowding them — they need space to get crispy, not steam each other. Cook for 4–8 minutes 08:00, then flip and cook another 4–5 minutes until golden all over. Transfer to a paper-towel-lined plate while you fry the rest.
- Cool slightly and serve: Let them cool for just a minute before you dig in. They’re best warm, right out of the pan. Try not to eat them all before they make it to the table. (No promises.)