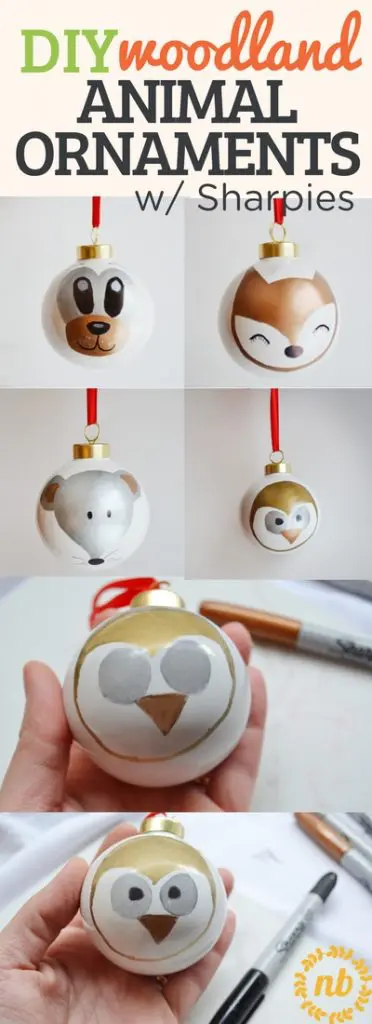
It’s the perfect time of year to start thinking about great DIY Christmas gifts for your friends and family! These adorable woodland animal Sharpie ornaments made with Sharpies are the perfect place to start.
Whip up a set of these cuties! Keep them for yourself or gift them to another. Either way, these ornaments make for tons of DIY Christmas fun!
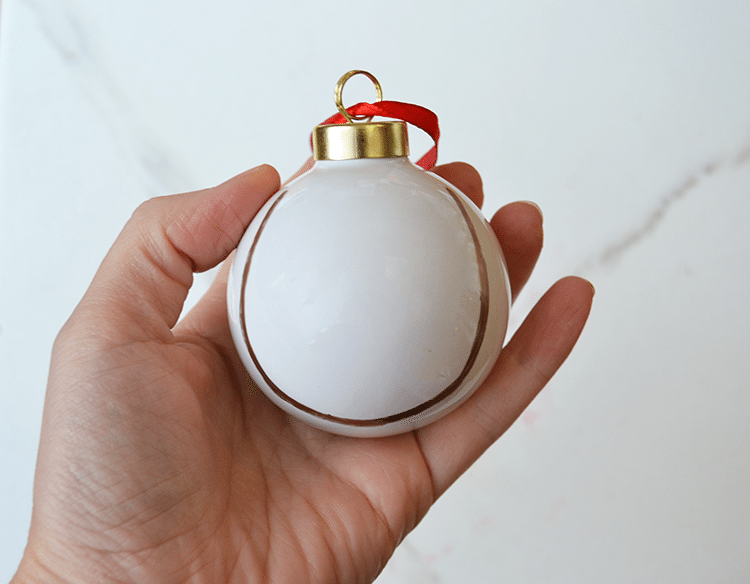
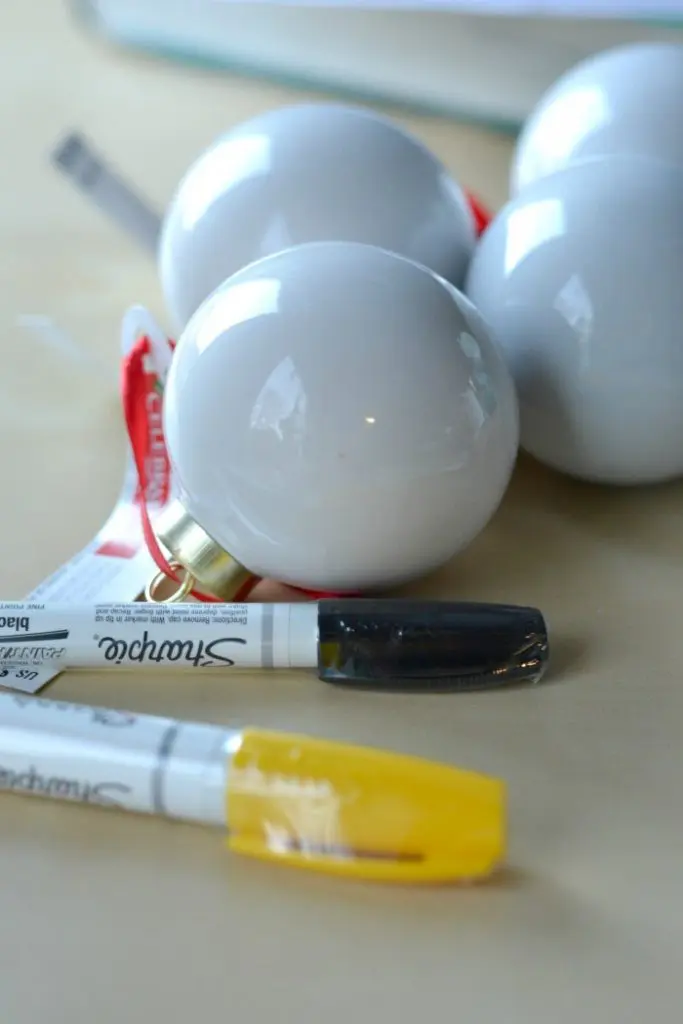
Materials Needed for Woodland Ornaments:
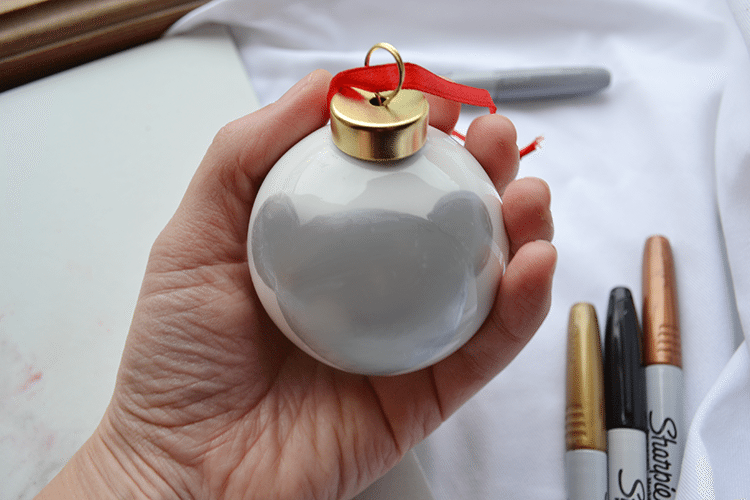
- Porcelain Christmas Ball Ornaments
- Metallic Sharpies
- standard Black Sharpie (I like using a twin tip for ultimate control)
Materials Needed for Colorful Kid’s Ornaments:
See below for the instructions for the Kid’s Colorful Ornaments
Fox & Mouse Sharpie Ornaments Video Tutorial:
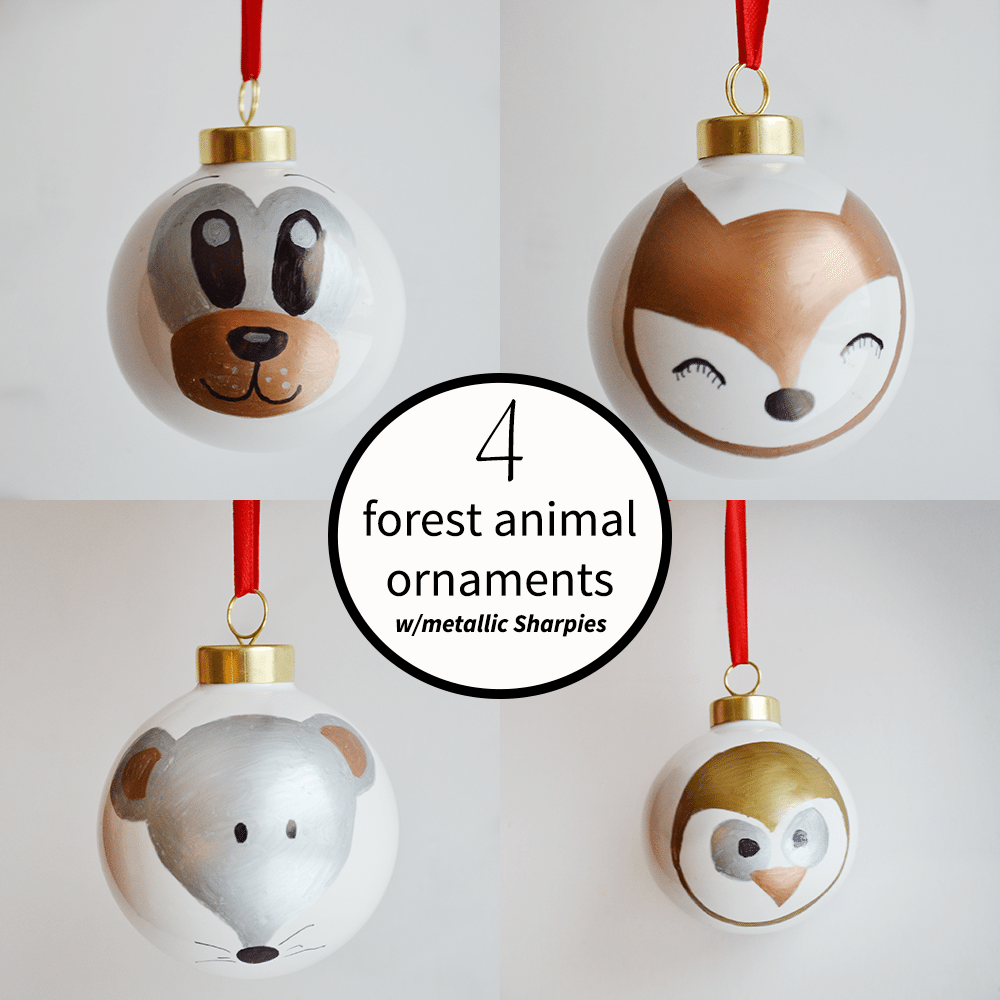
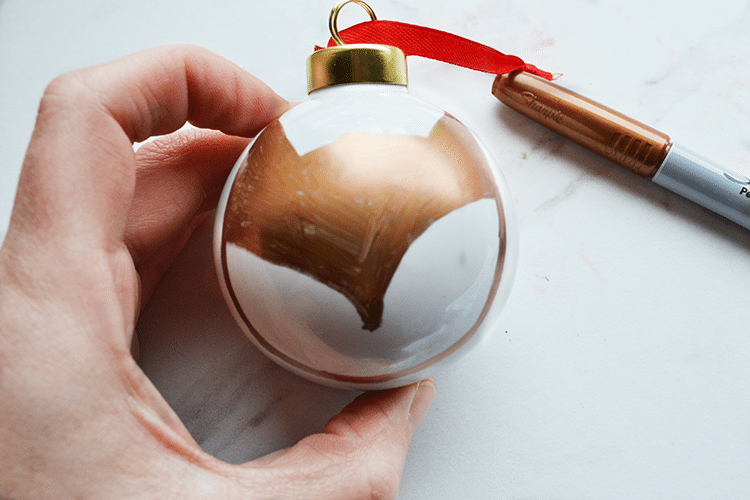
The Fox:
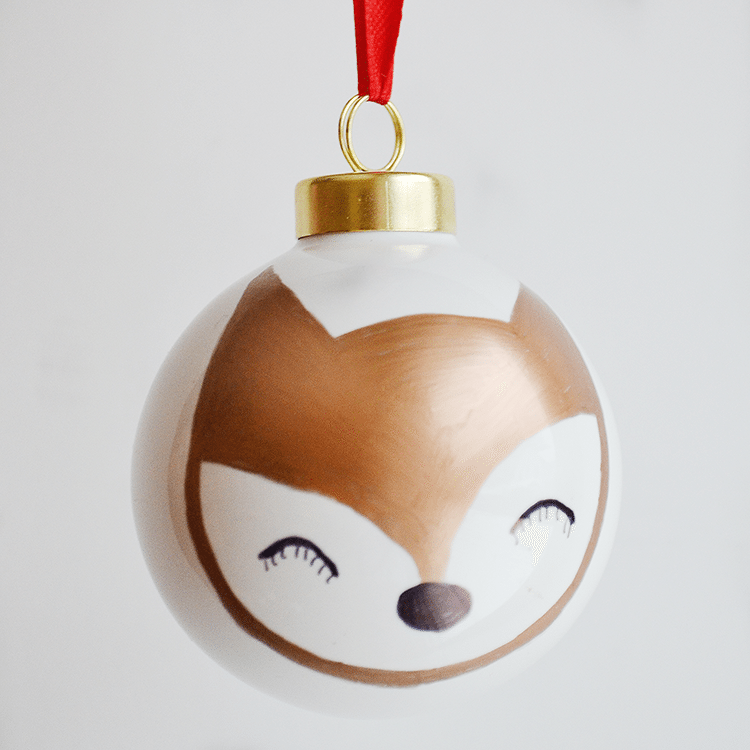
Step 1. Create a large U shape on the ornament with the bronze Sharpie…
Step 2. Give your fox a set of ears and nose. (It’s a little hard to explain…just try to create the shape I did! The video does a good job of showing this step.)–Think a Batman mask!
Step 3. Use the black Sharpie to add an oval for a nose, 2 upside down Us for eyes, and eyelashes.
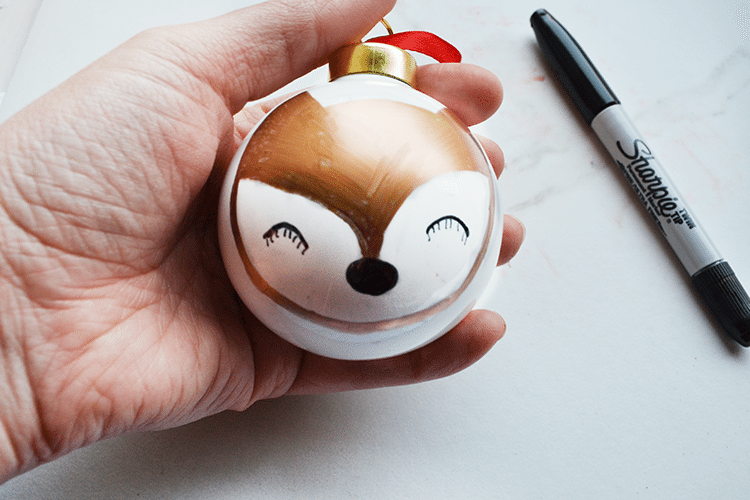
Good job!
The Mouse:
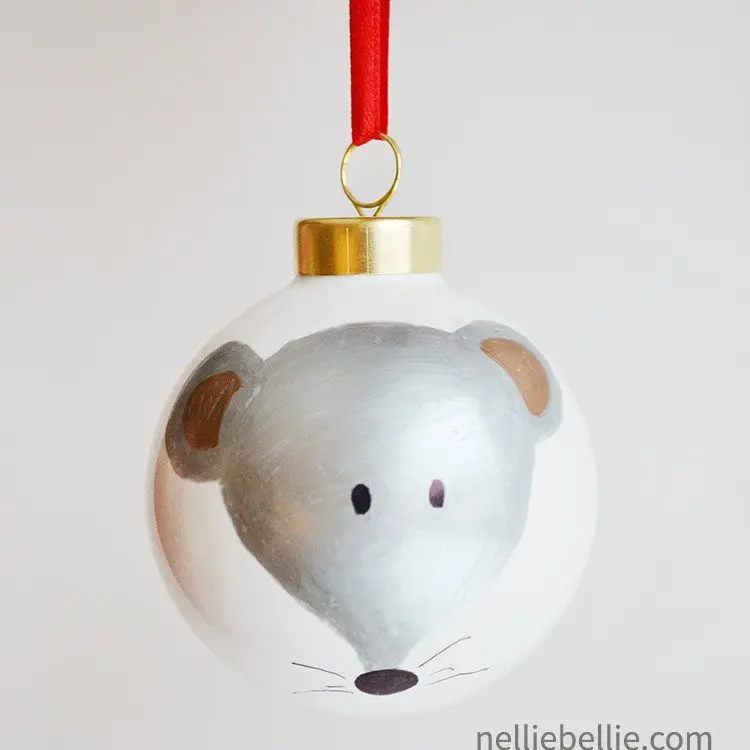
Step 1. Create a raindrop shape on the ornament with a silver Sharpie.
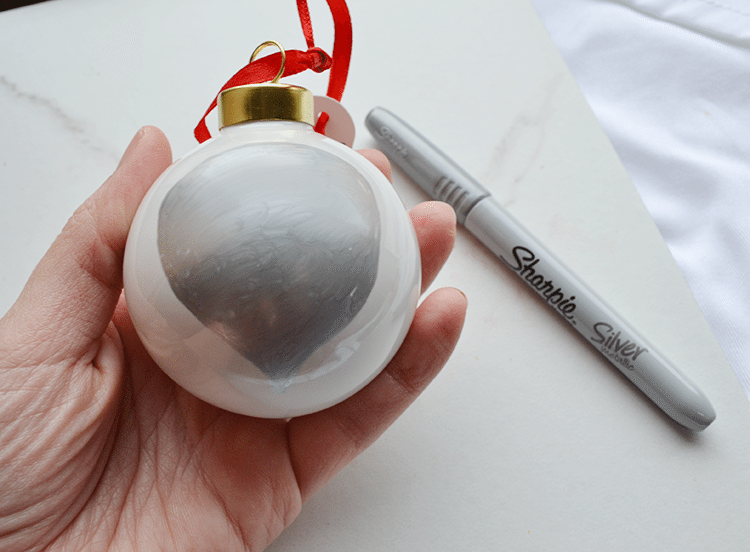
Step 2. Add 2 ears to the top of the raindrop shape.
Step 3. Add an oval with your black Sharpie to the bottom of the raindrop shape for the nose. Add a few whiskers. And, of course, 2 ovals for eyes.
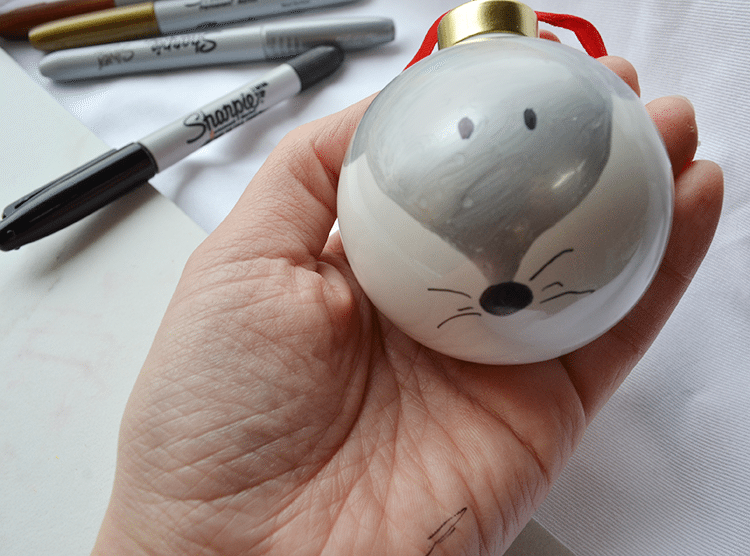
Optional: Fill in the ears a bit with the gold Sharpie.
Bear & Owl Sharpie Ornaments Video Tutorial:
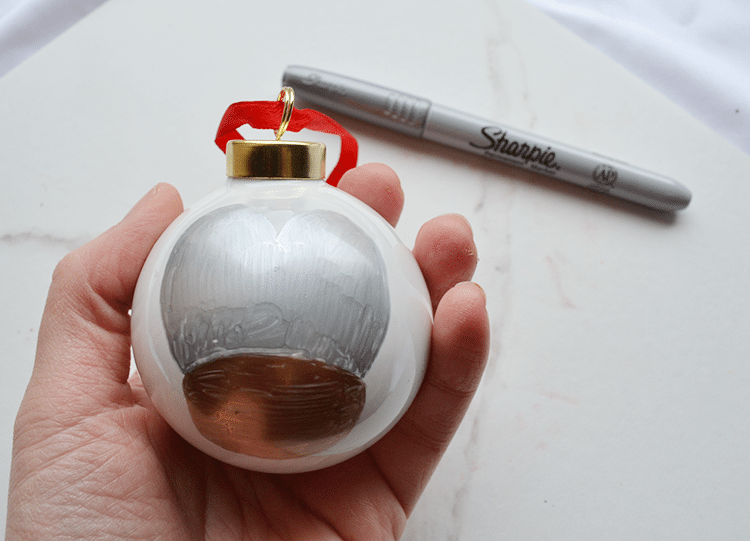
The Bear:
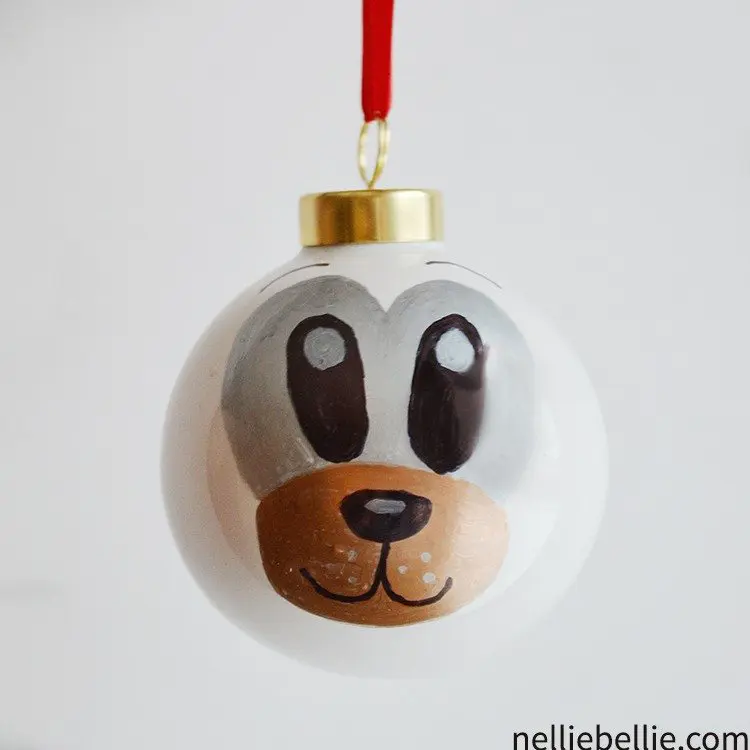
Step 1. Use the bronze Sharpie to create an oval towards the bottom of the Ornament.

Step 2. Use the silver Sharpie to create what looks like the top of a heart shape directly above the bronze oval. These will make the bear’s eyes.
Step 3. Use the black sharpie to add 2 ovals for the eyes, a nose, and a mouth.
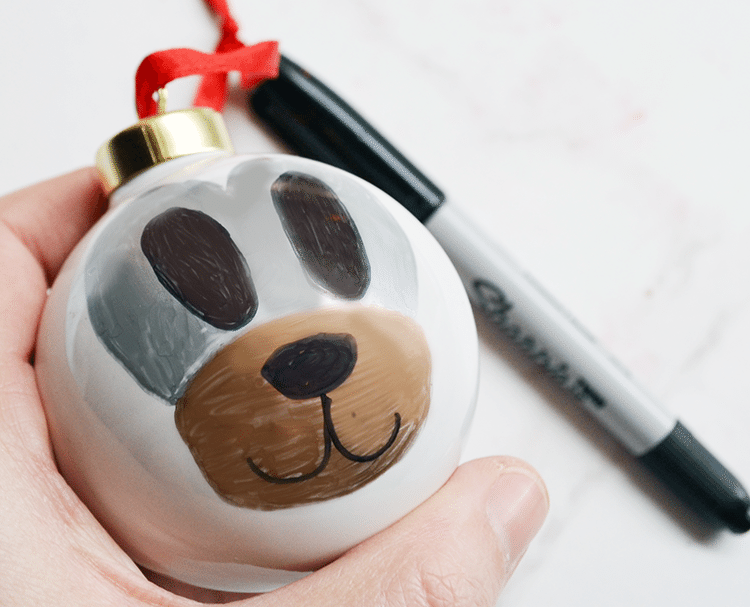
Optional: Use the silver Sharpie to add additional ovals to the eyes and nose, as well as “whisker spots.”
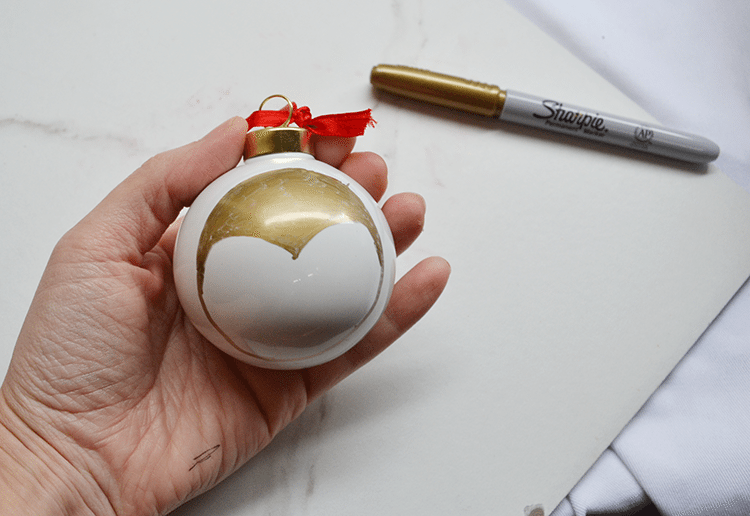
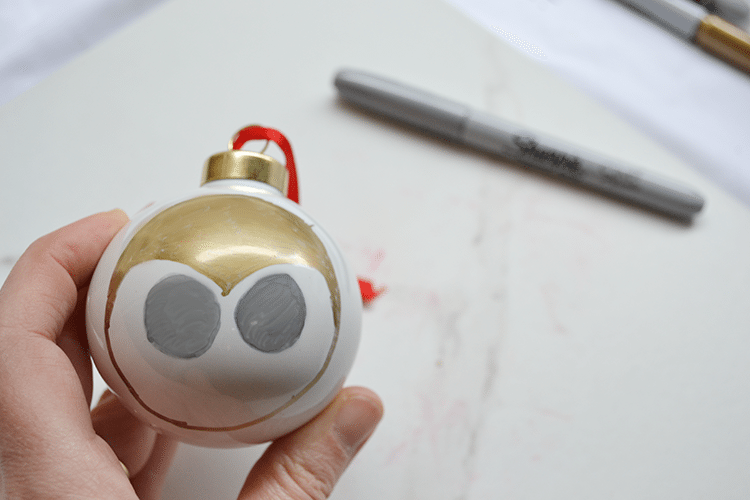
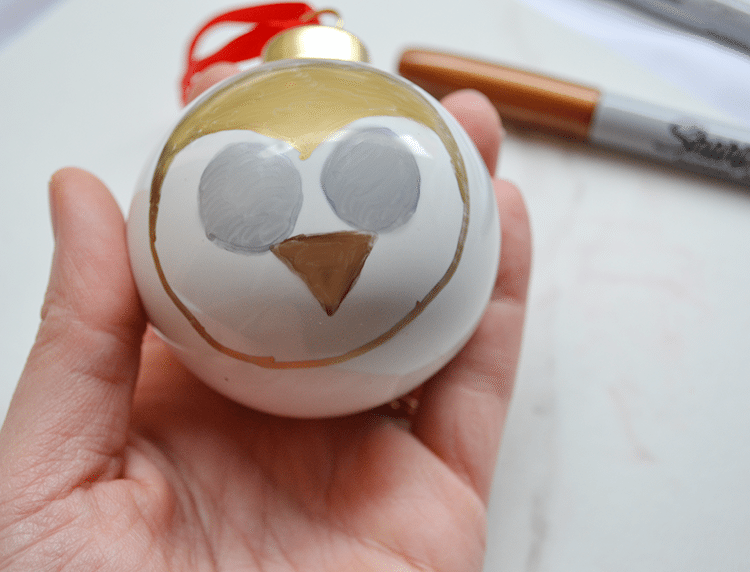
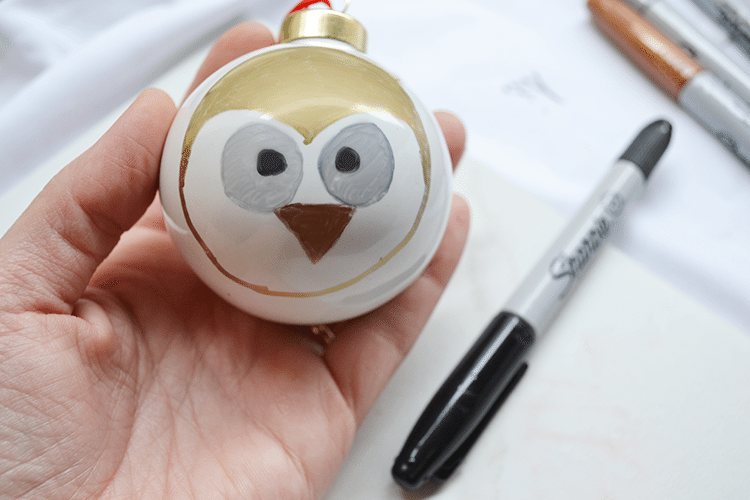
The Owl:
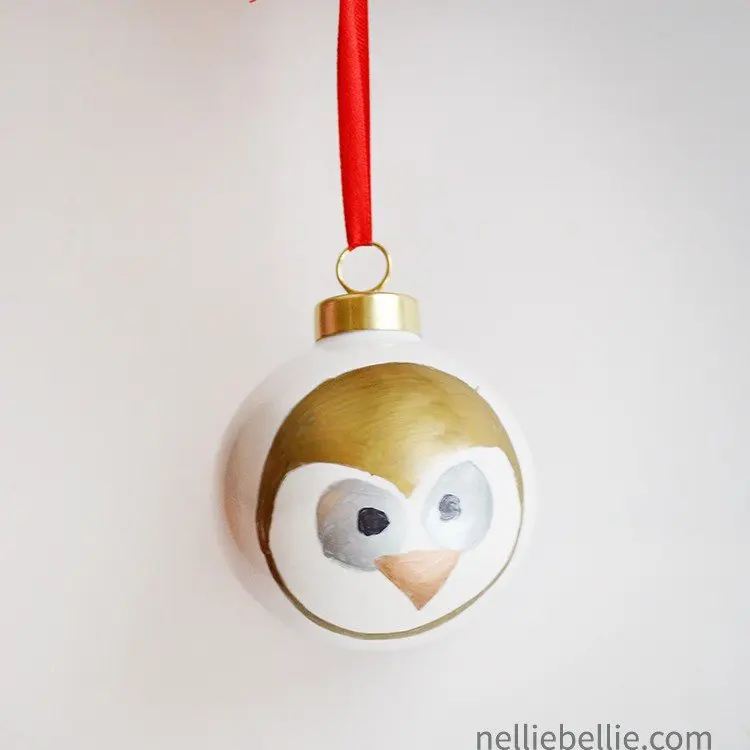
Step 1: Use the gold Sharpie to create a large circle around the ornament.
Step 2. Continue using the gold Sharpie to create the top of the owl’s head (the shape created will look similar to the top of a heart).
Step 3. Use the silver Sharpie to add 2 large circles for the eyes.
Step 4. Use the bronze Sharpie to create a triangle nose from one eye to the other.
Step 5. Use the black Sharpie to add small circles to the eyes.
There you have it! Four fun, adorable woodland animal ornaments to add to your tree or gift to friends and family. These DIY ornaments are a perfect craft for kids, so they can also give the gift of hand-crafted cuteness to add to the holiday spirit.
Instructions for colorful Sharpie ornaments:
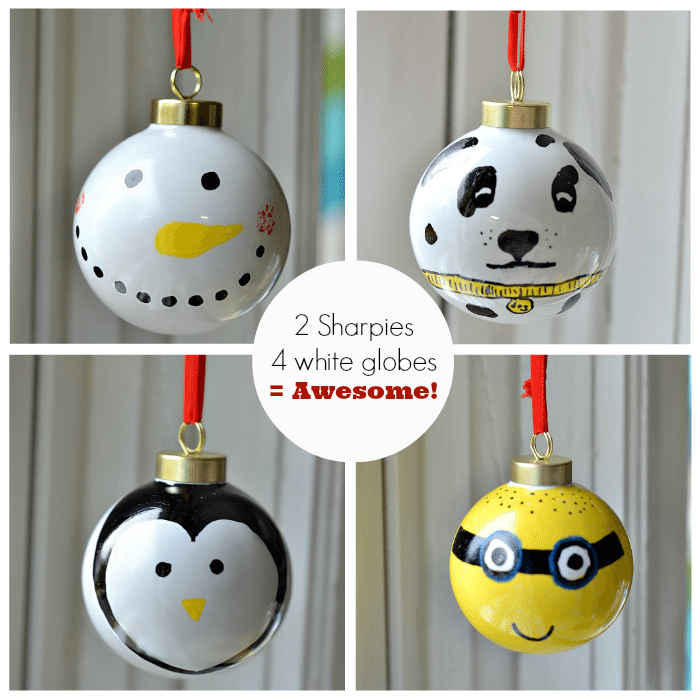
These Sharpie ornaments require only a yellow and a black Sharpie and white ornaments. The end. Then you channel your inner child and draw up their sweet little faces. No worries, I’ll walk you through how to draw them!
To Do:
Snowman Sharpie Ornaments:
- Draw 2 black dots for eyes.(black Sharpie)
- Draw a series of black dots for a mouth. (black Sharpie)
- Draw a carrot shape for nose. (yellow Sharpie)
if desired…dot a bit of red paint on the “cheeks”
Dalmatian Sharpie Ornaments:
- Draw eyes (black Sharpie). draw 2 black ovals then create 2 small circles inside the bottom of those ovals, and a fill 2/3 of the top half of the oval leaving only a small white area inside the oval.
- Draw the nose and mouth (black Sharpie). draw a heart shape for the nose, fill in. The mouth is just a soft line.
- Add spots randomly about the ornament (black Sharpie). be sure to add one or two around the eyes.
- Draw a line around the bottom of the ornament (yellow Sharpie). this is the collar.
- Outline the line with black Sharpie.
- Draw a circle for the name tag (yellow Sharpie).
- Outline the circle with a black Sharpie.
Penguin Sharpie Ornaments:
- Draw a large heart on the ornament (black Sharpie). This is the outline of the face.
- Thicken the line outwards and to the top of the ornament for the heart.
- Draw 2 dots for the eyes (black Sharpie).
- Draw a triangle for the nose (yellow Sharpie).
Minion Sharpie Ornaments:
- Color the ornament yellow, EXCEPT 2 small circles (for the eyes).
- Draw a black line across where the eyes are (don’t color the eyes!), all the way around the ornament.
- Create 2 large circles around the eyes (black Sharpie). these are the goggles.
- Draw 2 small dots inside the circles (black Sharpie). these are the eyes.
- Draw a small u for the mouth (black Sharpie).
- add several small dots to the top of the ornament (black Sharpie). this is the “hair”.
If desired, outline the goggles in another color.
For the record: my kids said I didn’t make the eyes big enough for the Minion. I guess those goggles need to be massive!! Live and learn, and don’t ask kids!
Other Sharpie projects:
- Sharpie Holiday Ornaments: Snowman, Penguin, and more
- Sharpie Table
- Pipe Paper Towel Holder
You can find the ornaments and sharpies on Amazon.
Adorable… where can I find these ornaments ?