
Update, October 2026. This is one of my older puff pastry recipes, and I finally gave it the redo it deserved. I made it again, simplified the steps, added grams, and added tips for storing it. Same recipe at heart, just easier to get right.
Many puff pastry recipes are time-consuming. Here’s an easy puff pastry recipe where most of the time is just chilling, so the hands-on part is short. Check out this puff pastry recipe perfect for your next savory appetizer or to add a bit of buttery carb sweetness to your dessert (hello rhubarb tart!)
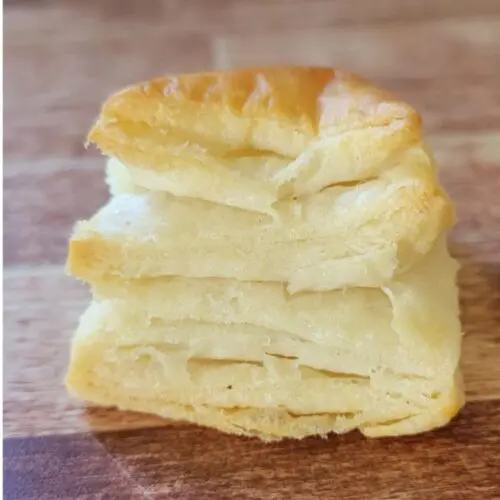
This recipe creates a buttery, flaky puff pastry equal to about 2 sheets of puff pastry. Use it to make the reader favorite Ground Beef Wellington.
Yes, this recipe totally works and I use it often! Don’t buy puff pastry from the store…homemade is SOOOO much better. And when you can make it as quickly and easily as this recipe does…why not?
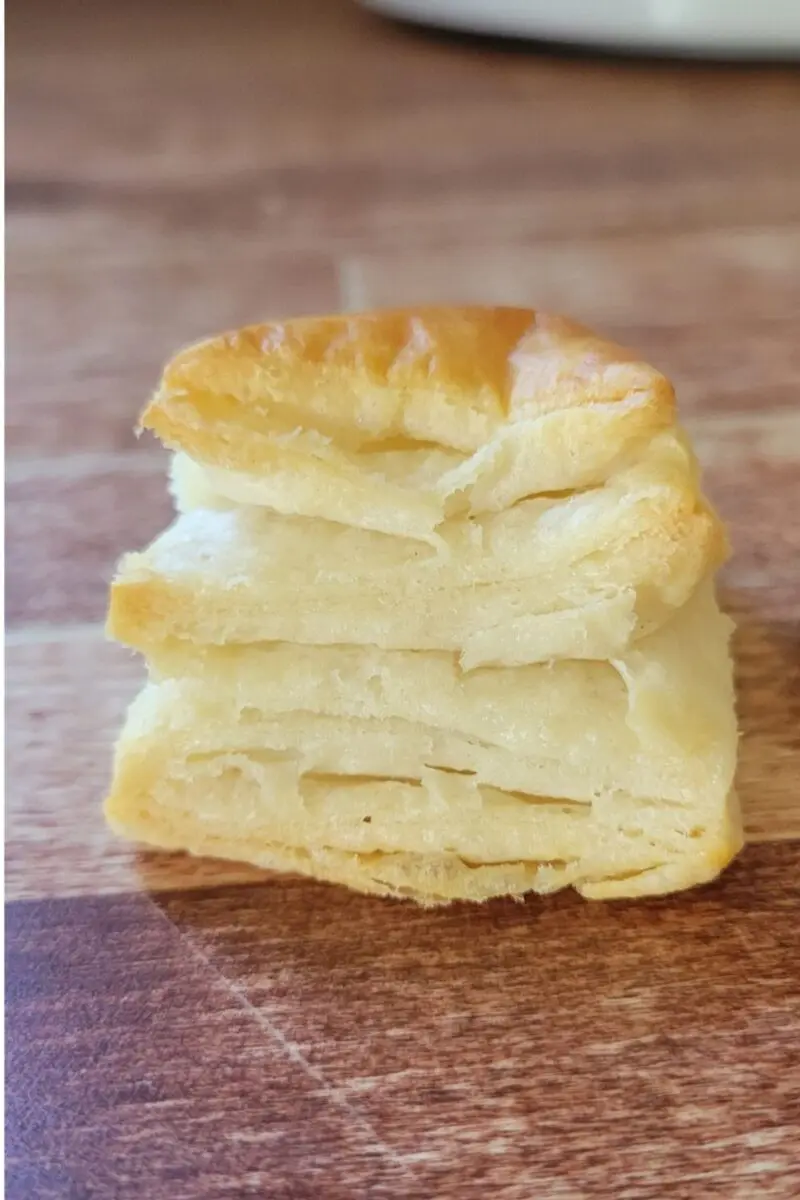
What is rough puff pastry?
Technically, this is a rough puff, which is the easier cousin of classic puff pastry.
Classic puff pastry wraps a flat block of butter inside a plain dough, then rolls and folds it again and again with lots of chilling in between. You get super even, tall layers, but it can take hours and a lot of fussing.
Rough puff skips the butter block. You mix cold bits of butter right into the flour, add ice water, then roll and fold. The chunks flatten into streaks of butter as you fold, and those streaks turn into flaky layers in the oven.
The trade off, from what I understand, is that classic rises a little taller and more evenly. But rough puff is buttery, flaky, and works for everything you would use store-bought for, like tarts, Wellingtons, hand pies, and appetizers. I’ll be honest, I’ve never made the classic version. Rough puff works great for everything I need, and it is so much easier.
What is the secret to puff pastry?
My friends, there IS a secret to puff pastry. Well, not really a secret. More like a YOU MUST DO THIS OR IT WON’T TURN OUT!
Cold Cold Cold Cold. Like, MN winter cold.
Every ingredient and bowl and ANYTHING you can get ice cold. And stay as cold as possible until it hits the oven. And the oven should be preheated and HOT.
Those cold ingredients, especially the butter, get blasted with the heat and create lovely pockets of air.
My favorite cold trick: put your flour in the bowl you will mix in, cover it, and stick it in the fridge the night before. Forgot? Thirty minutes in the freezer works too. Then keep everything in the fridge as you work. I cube my butter and put it right back in the fridge while I get everything else ready.
What You Need
I’ve added grams to the recipe this time. Weighing your flour is the easiest way to get the same dough every single time, since a scoop packed from the bag can run heavy.
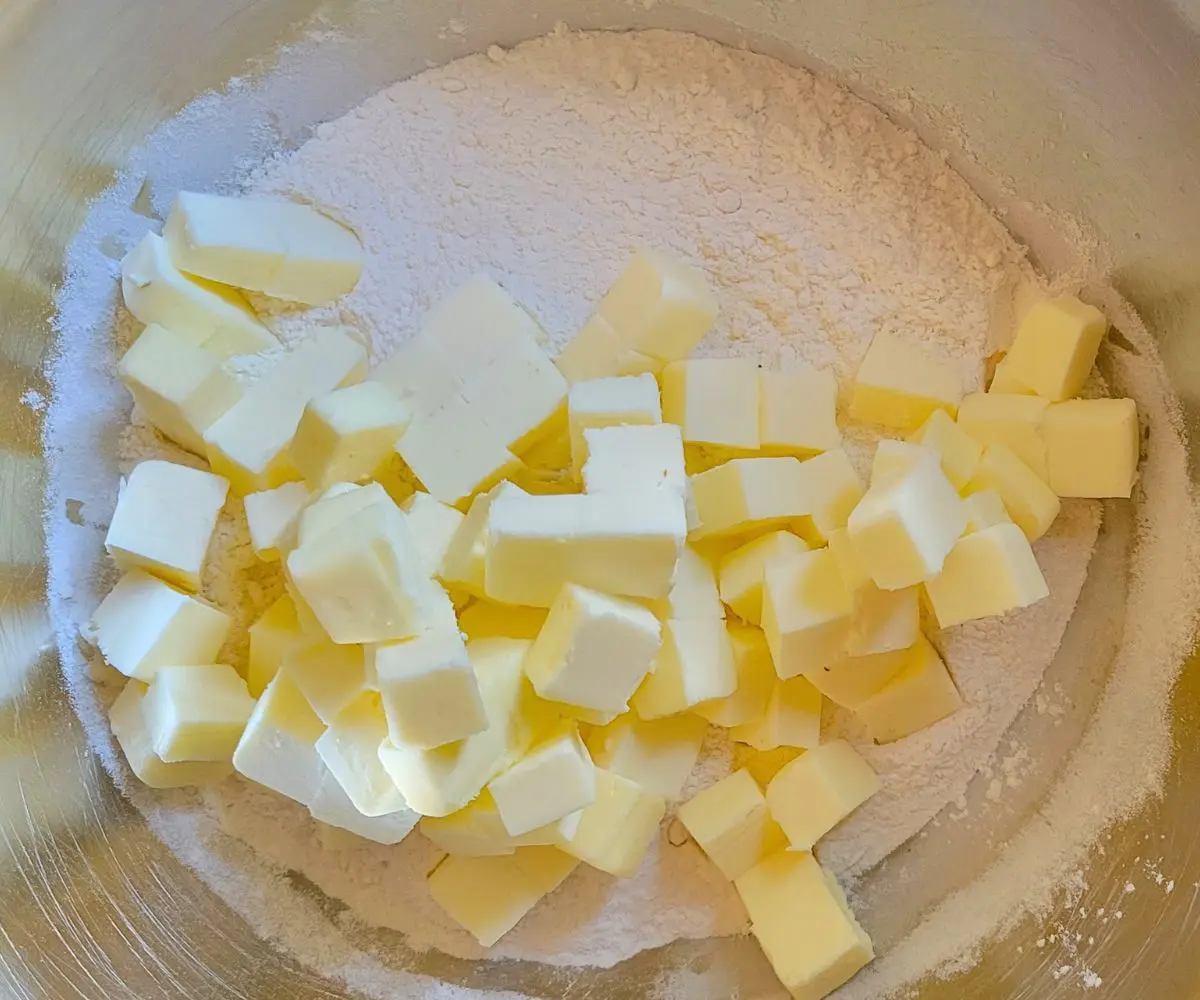
- Butter. 285 g (2 1/2 sticks or 1 1/4 cups). Your butter needs to be very, very cold. Cube it into 1/2 inch cubes and put it right back in the fridge (or freezer) while you get everything ready. Use unsalted butter, since the salt is measured separately.
- Water. About 1/2 cup. Like all the other ingredients, this should be very, very cold. In fact, add ice to your water and pour from that. It doesn’t need to be exact.
- Salt. 6 g (1 teaspoon). Use unsalted butter with this full amount of salt.
- Flour. 240 g (2 cups) all-purpose. Chill it in the bowl, covered, in the fridge the night before. Or 30 minutes in the freezer if you forgot.
What To Do
1. Combine flour and salt
In a medium bowl, stir together the flour and salt. If your flour has been chilling since last night, you are already ahead of the game. If not, pop the bowl into the fridge while you cube your butter. If you have…hooray! Let’s move on…
2. Cut in the cold butter
If you haven’t yet done so, cube your cold butter into 1/2 inch cubes and get it back in the fridge until you need it.
It is extremely important that your butter is very, very cold. In fact, I try to use frozen butter whenever possible. Keeping the butter very cold when it hits the oven is what gives puff pastry those lovely flaky layers.
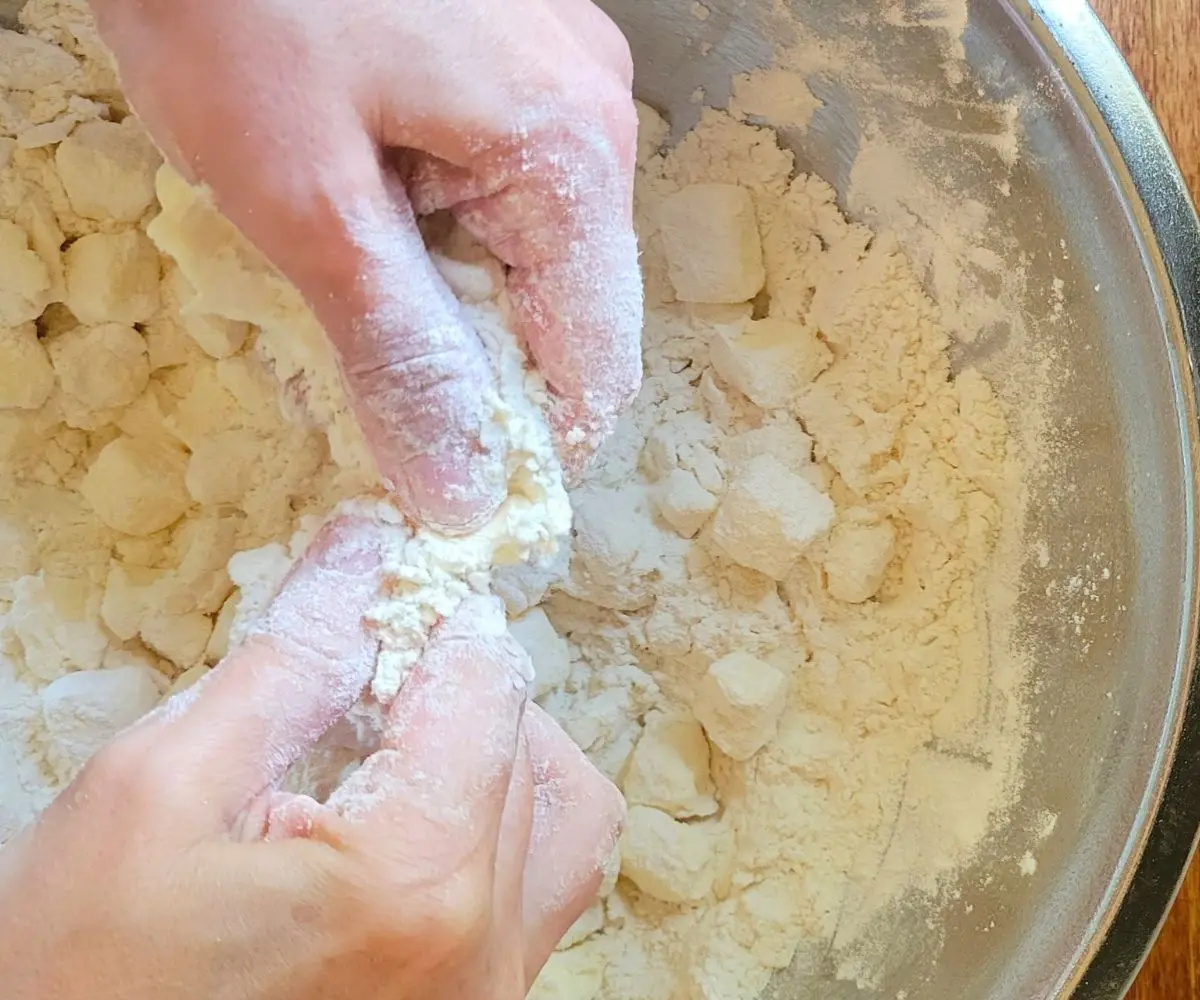
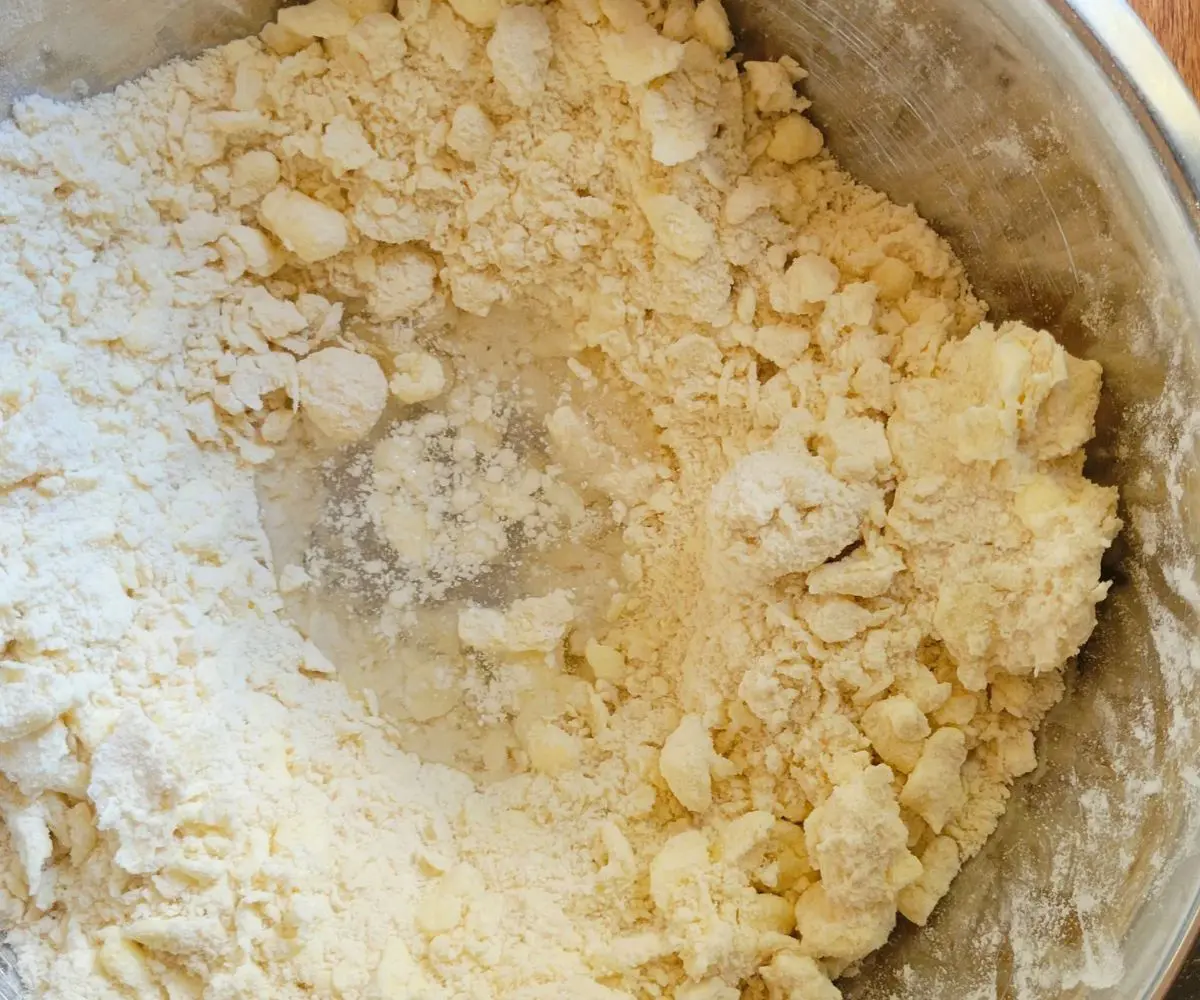
Add the cubed butter to the flour and toss to coat. Use a pastry cutter to cut the butter in just a little. Don’t go for pea size here. You want a mix of sizes, with some pieces still whole 1/2 inch cubes. Those bigger chunks flatten into sheets of butter when you roll and fold, and that’s where the layers come from.
Work as quickly as possible and, if you are finding that it is taking longer than you like, put the bowl into the fridge to chill for a bit. Take it out and try again.
If you don’t have a pastry cutter, use two knives to “cut”. Cut the butter several times, rotate the bowl, and do it again.
3. Add ice water
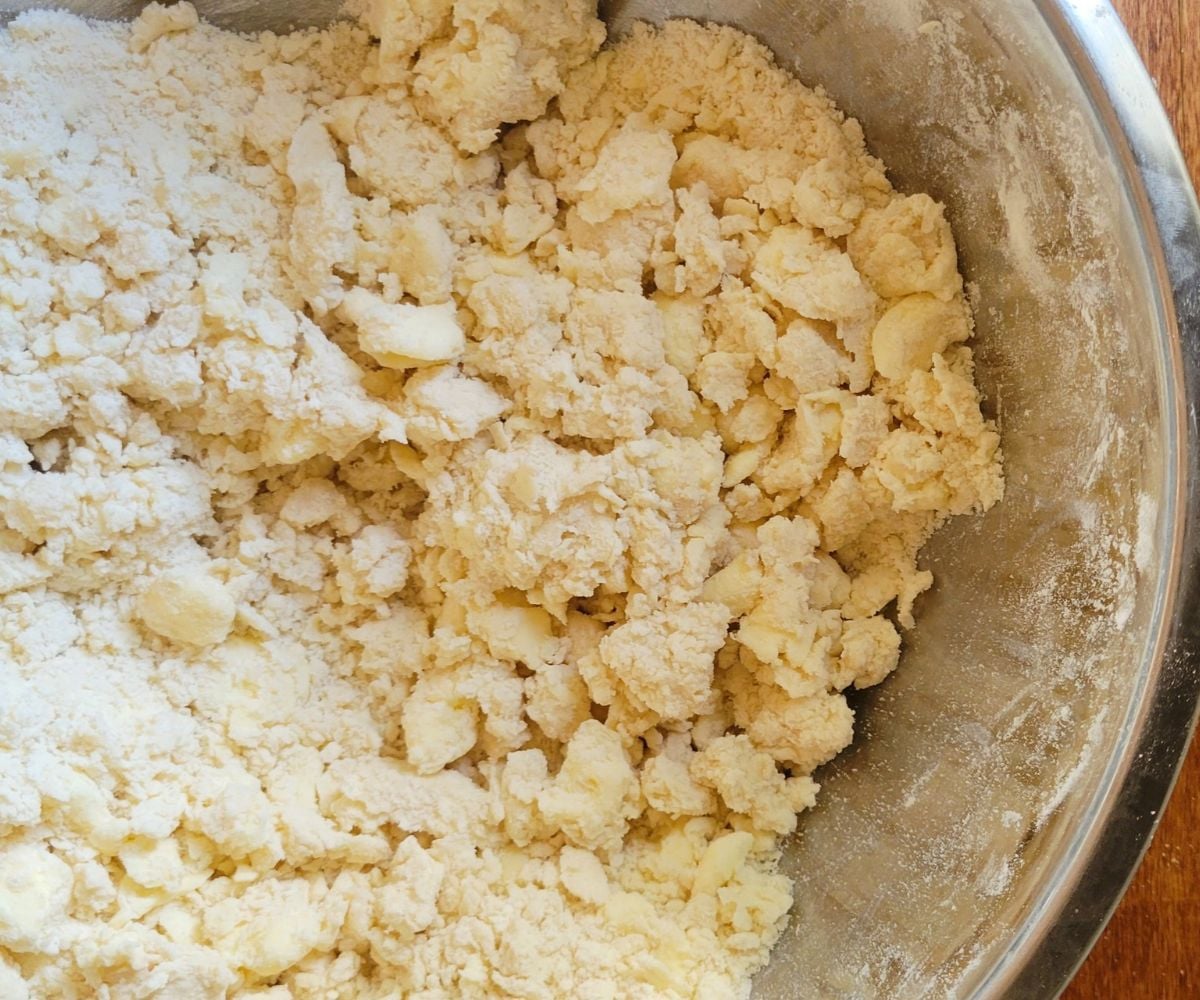
Make a hole in the center of the dough and pour in all of the ice water. Stir quickly with a fork until you have a shaggy dough. It won’t be fully together and it will still be crumbly and dry. Don’t worry, it will work out.
4. Give it a quick chill
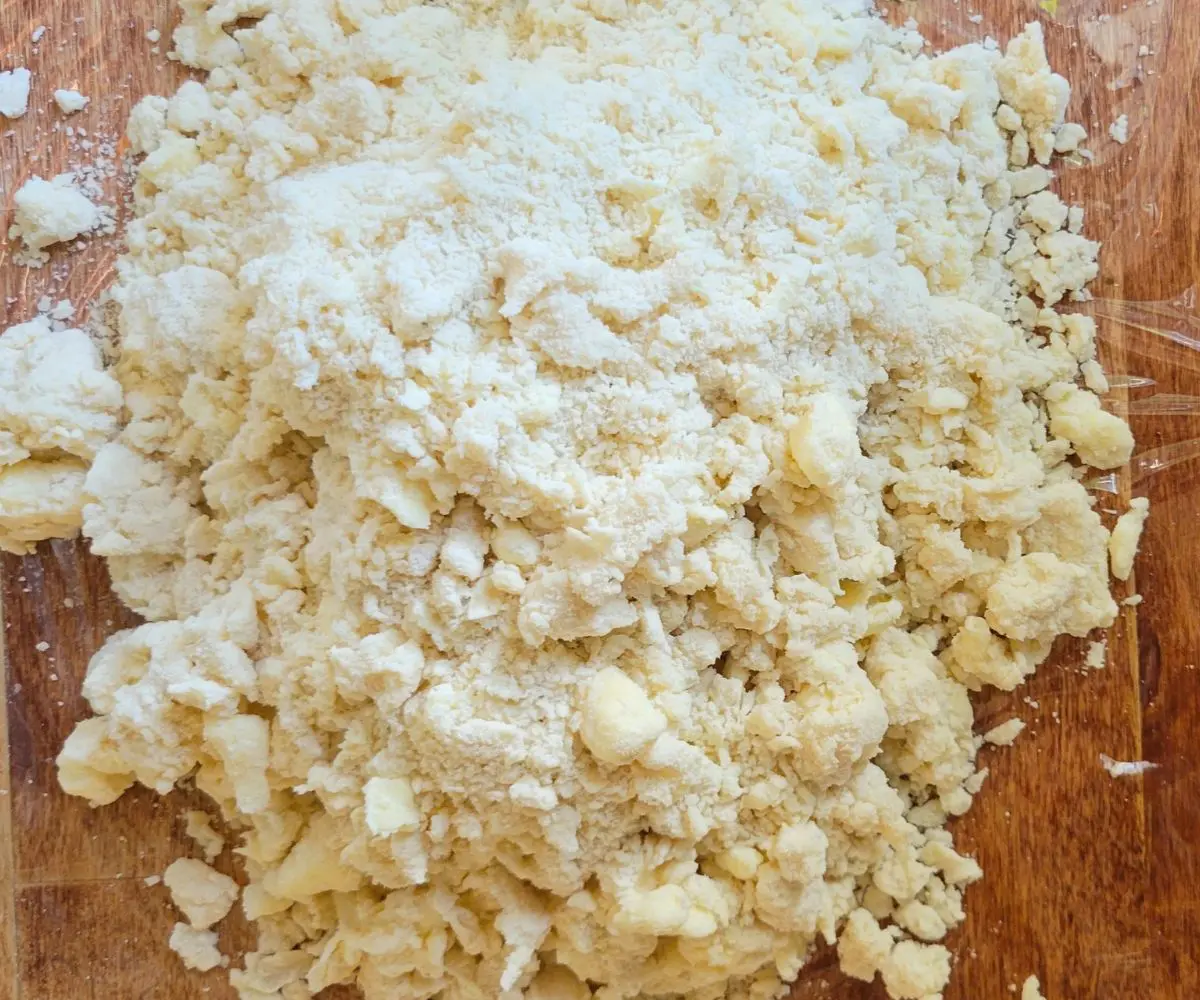
Dump the shaggy dough onto a piece of plastic wrap, press it into a rough square, wrap it up, and put it in the fridge for 20 to 30 minutes while you get your board floured and ready. This little chill lets the flour soak up the water and keeps the butter cold, which makes the next step much easier.
5. Roll and fold
Flour a cutting board or pastry cloth very well (this is going to want to stick on you, especially the first few times).
Unwrap the dough onto your floured surface and, working quickly, pat and press it into a rough square. Don’t be precise here, just quick. The dough will be dry and seem like it won’t possibly work…stay with it. Seeing chunks of butter in the dough is GOOD, as long as they look smooth.
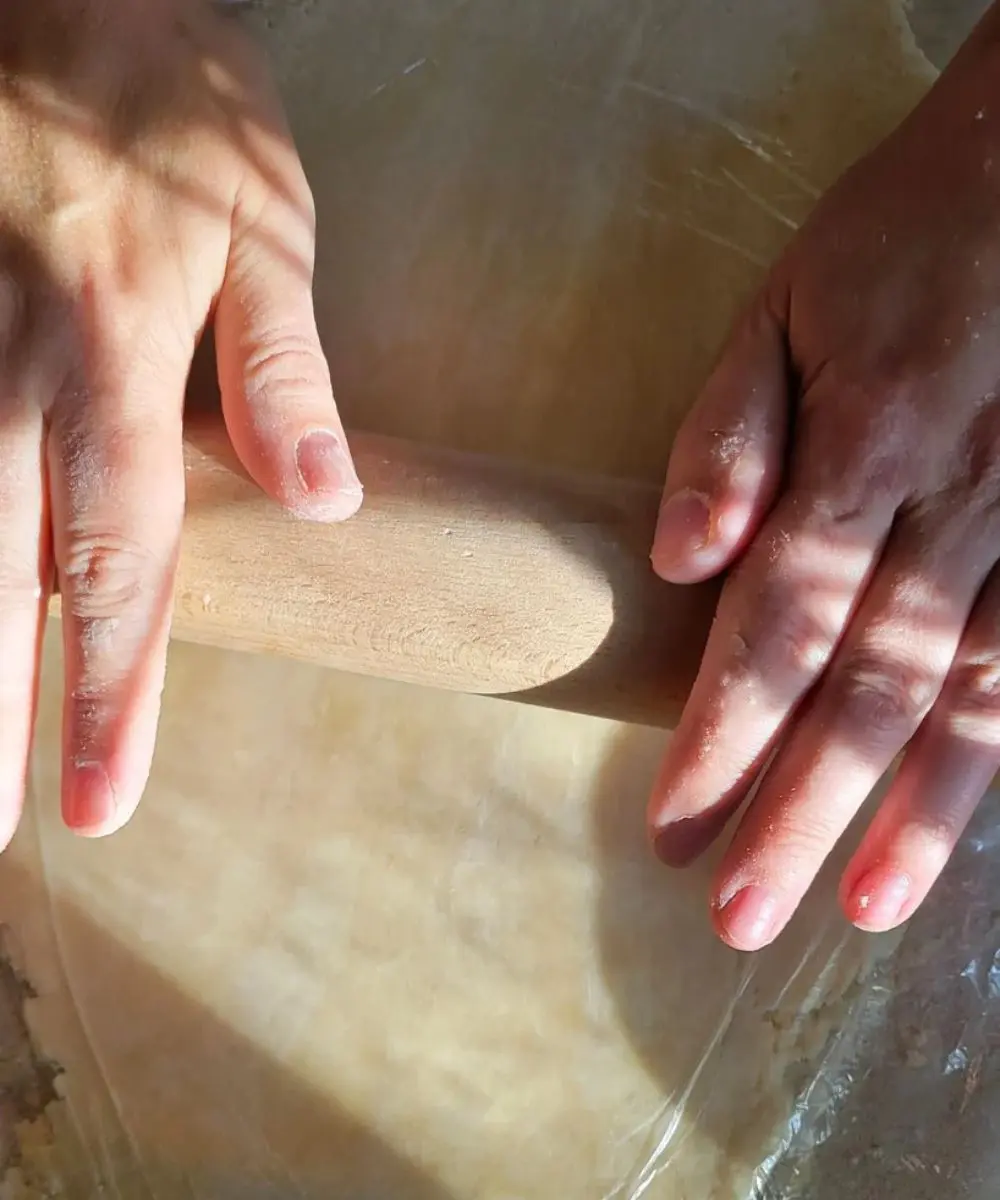
With a well-floured rolling pin, roll the dough into a semblance of a rectangle about 12 inches long.
Fold the dough… the bottom third over the middle third and the upper third on top of the middle, as well. Turn the dough one-quarter turn, roll it back out into a rectangle about 12 inches long, and fold again. Use additional flour as needed to prevent the dough from sticking to itself and the board.
Note: the first couple of times will be a bit ridiculous. Stick with it, move quickly, and it will work.
Keep going until you have done about 5 rolls and folds total, counting that first one. The dough should feel smooth and well mixed.
6. Chill
Tightly wrap the folded pastry in plastic wrap and put it into the fridge to chill for at least an hour. Overnight is even better! Mine sat for about 3 hours while I got other things done, and it turned out great.
Guess what, just like the store-bought versions, this homemade puff pastry dough can go into the freezer until you need it. Check out the storage and thawing tips below.
7. Roll and bake
When you are ready to bake your puff pastry, take the dough out of the fridge and unwrap it. If it is in the freezer, thaw it overnight in the fridge first (see the thawing tips below).
Gently, and quickly, roll the dough out one more time to about 1/4 inch thick (make sure you use a bit of flour on surfaces to keep it from sticking).
Cut the dough into the shape you want. Or, like in the case of my tomato tart, simply use the whole sheet.
Give it a milk or egg wash to get a nice golden color, if you like. Set the pieces right on a sheet pan.
Heat your oven to 425 degrees. The size you cut your pastry into will determine the bake time. Small squares took me about 15 minutes, and most recipes will need about that. You are going for a deep golden brown. Do NOT open the oven to peek until at least 10 minutes into the cooking time.
Tips for homemade puff pastry
- If the dough gets soft or sticky at any point, pop it in the fridge for 10 minutes before you keep going. Cold butter is what makes the layers.
- If you want thin, not puffy pastry, poke holes all over your dough to allow steam to escape while baking.
- Roll your dough not too thin so it can’t puff and not too thick so it squishes itself. About 1/4 inch is perfect.
- If your pastry is still a little doughy in the middle, roll it a touch thinner next time or bake it a few minutes longer.
- Always use a hot and preheated oven to cook your puff pastry so that the heat immediately hits super cold dough and does the magical puffing stuff.
- You can skip an egg wash, if you like (I usually do), or use a milk wash. An egg wash gives you that shiny crispy appearance, a milk wash gives you a pie pastry look.
How to store puff pastry dough
One of my favorite things about making your own is that you can do it ahead and have it ready when you need it.
In the fridge. After your last fold, wrap the dough tightly in plastic wrap. It keeps for 2 to 3 days. Roll and bake when you’re ready.
In the freezer. Since this recipe makes about 2 sheets, cut the dough in half before wrapping so you can pull out just what you need. Press each half into a flat rectangle, wrap it tightly in plastic wrap, then slide it into a freezer bag and squeeze out the air. Write the date on the bag. It will keep for up to 3 months.
Thawing. Overnight in the fridge is the best way. Move the dough from the freezer to the fridge the night before, still wrapped, and it will be ready to roll the next day. In a rush? Leave a flat rectangle on the counter for about 30 to 45 minutes, just until it bends a little without cracking. You want it cold but workable. If it starts to feel soft or sticky, back in the fridge it goes for 10 minutes. Skip the microwave or a warm spot, because melted butter means no layers.
Then roll it out one more time, cut, wash, and bake like usual.
Puff Pastry Recipes
Once you have a batch in the fridge or freezer, here are some of my favorite puff pastry recipes to use it in. Each of these calls for puff pastry sheets, and this recipe makes about 2.
Savory
- Ground Beef Wellington. Looks fancy, tastes amazing, and uses plain old ground beef. A reader favorite for a reason.
- Philly Cheese Steak Puffs. Little pastry squares piled with roast beef, peppers, onions, and melty provolone.
- Puff Pastry Tomato Tart. A rough and tumble tart with fresh tomatoes, mozzarella, and basil. Great for a farmer’s market haul.
- Easy Beef Empanadas. Skip the traditional empanada dough and wrap spiced ground beef in flaky pastry pockets.
- Vegetarian Cabbage Pie. Cabbage, onions, and potatoes under a golden pastry lid. Cozy and meat-free.
Sweet
- Puff Pastry Rhubarb Tartlets. A creamy cheese filling and tangy rhubarb in tiny pastry shells.
- Patriotic Fruit Tart. A cream cheese layer topped with berries laid out like a flag.
- 4-Ingredient Puff Pastry Apple Donuts. Apple slices wrapped in pastry with cinnamon sugar. So cozy for fall.
Easy Homemade Rough Puff Pastry
Ingredients

Method
- In a medium bowl, stir together the flour and salt.
- Add the cold, cubed butter and toss to coat. Cut the butter in just a little with a pastry cutter or two knives. You want a mix of sizes, with some pieces still whole 1/2 inch cubes.
- Make a hole in the center of the dough and pour in all of the ice water. Stir with a fork until you have a shaggy dough. It will still be crumbly and dry.
- Dump the dough onto plastic wrap, wrap it, and put it in the fridge for 20 to 30 minutes while you get your board ready.
- Flour a cutting board or pastry cloth very well. Unwrap the dough and work it together quickly. The dough will be dry and seem like it won’t possibly work…stay with it. Seeing chunks of butter is good, as long as they look smooth.
- With a well-floured rolling pin, roll the dough into a rectangle about 12 inches long.
- Fold the dough in thirds, the bottom third over the middle and the top third over that. Turn it a quarter turn, roll it back out into a rectangle, and fold again. Use extra flour as needed.
- Repeat the rolling and folding until you have done about 5 total, counting the first one. The dough should feel smooth and well mixed.
- Wrap the dough tightly in plastic wrap and chill in the fridge for at least 1 hour, or overnight. You can also freeze it. Thaw overnight in the fridge before using.
- Roll the dough out to about 1/4 inch thick, cut into shapes, and brush with milk or egg wash.
- Bake on a sheet pan at 425 degrees for about 15 minutes for small squares, until deep golden brown. Don’t open the oven for the first 10 minutes.
